
Installation of AlmaLinux Operating System with Screenshots.
AlmaLinux is the latest Free Linux-based Operating system. It is a community-driven open-source project built from the source code of Red Hat Enterprise Linux (RHEL). After the CentOS Linux died, AlmaLinux comes into play. This OS is an enterprise server Operating system and a stable Linux distribution. AlmaLinux comes with a long end-of-life window.
Download AlmaLinux ISO
Currently, AlmaLinux is no-cost or Free available on different Architecture like x86_64, aarch64, and ppc64le. You can download it according to your hardware.
Hardware Requirements :
Below are the requirements:
- A 64-bit
- At least 20 GB available disk space
1. Installation
Installation of AlmaLinux is the same as other Linux Based Operating systems like CentOS.First Boot From ISO or USB Drive, which you created or download ISO File.
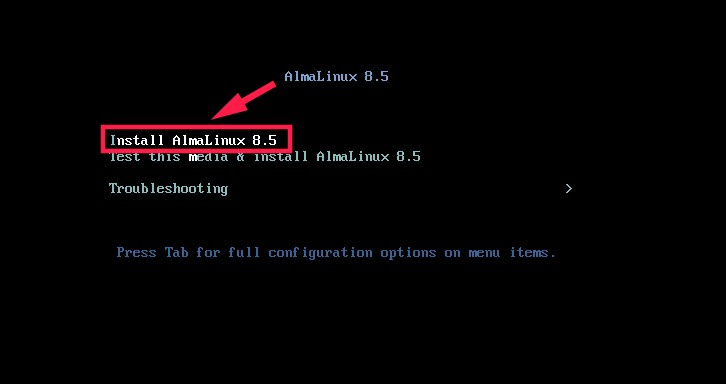
- Select install AlmaLinux 8.5 on GRUB menu.
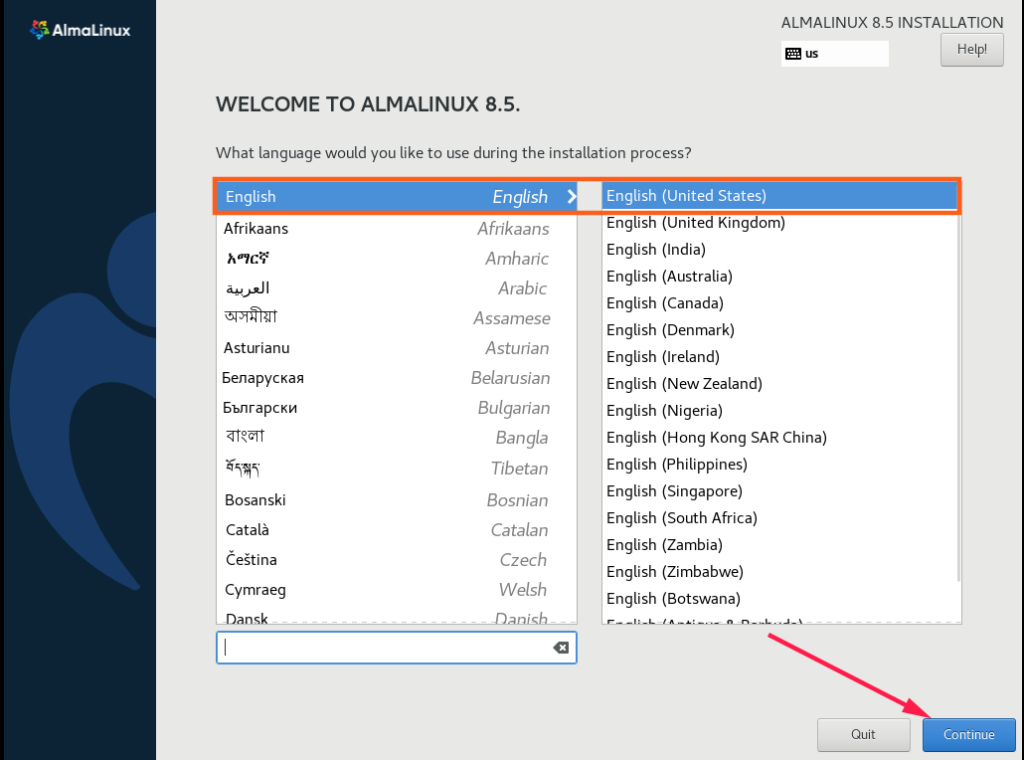
- Choose your language preference for Installation process.
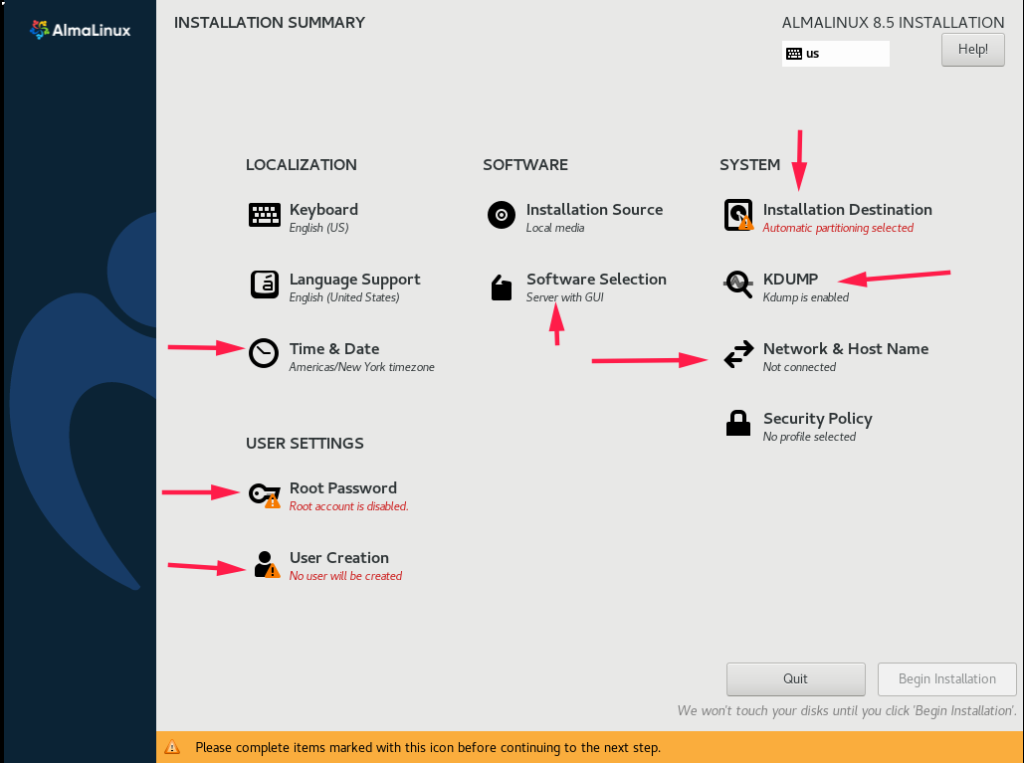
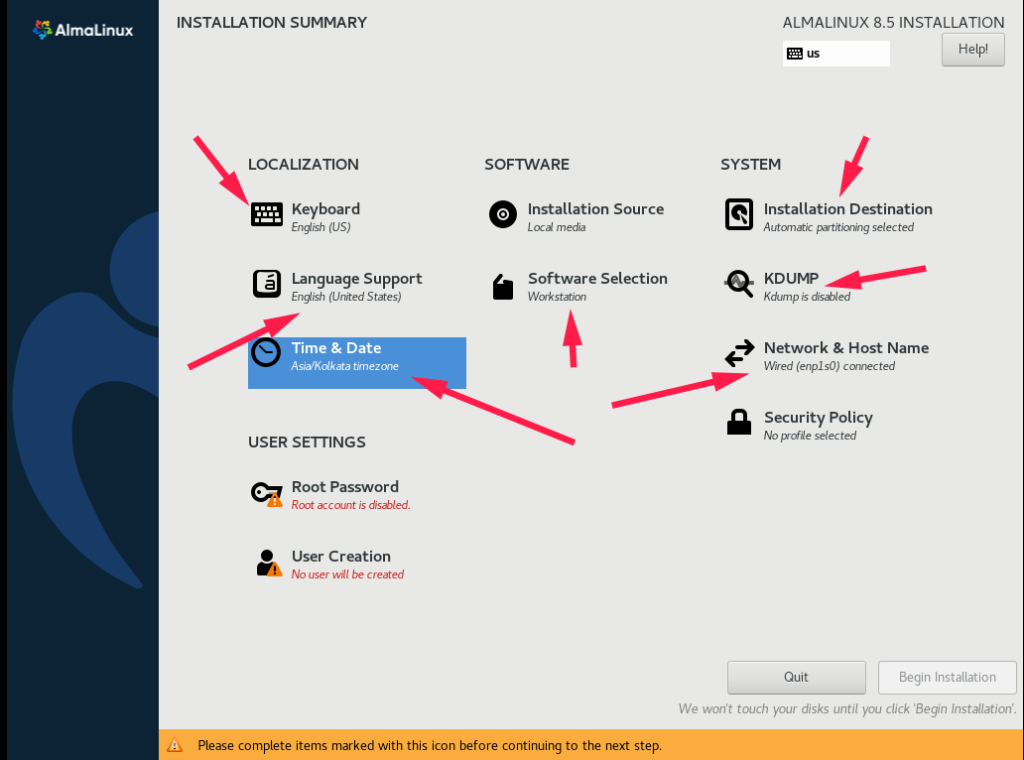
- In step third AlmaLinux 8 gives us an options to set location, Date and Time . In the software section , i have choosen Server workstation base environment . In the System section there is an installation destination. You can choose to customize your partition or Automatic partioning select.
2 . Select software to be installed
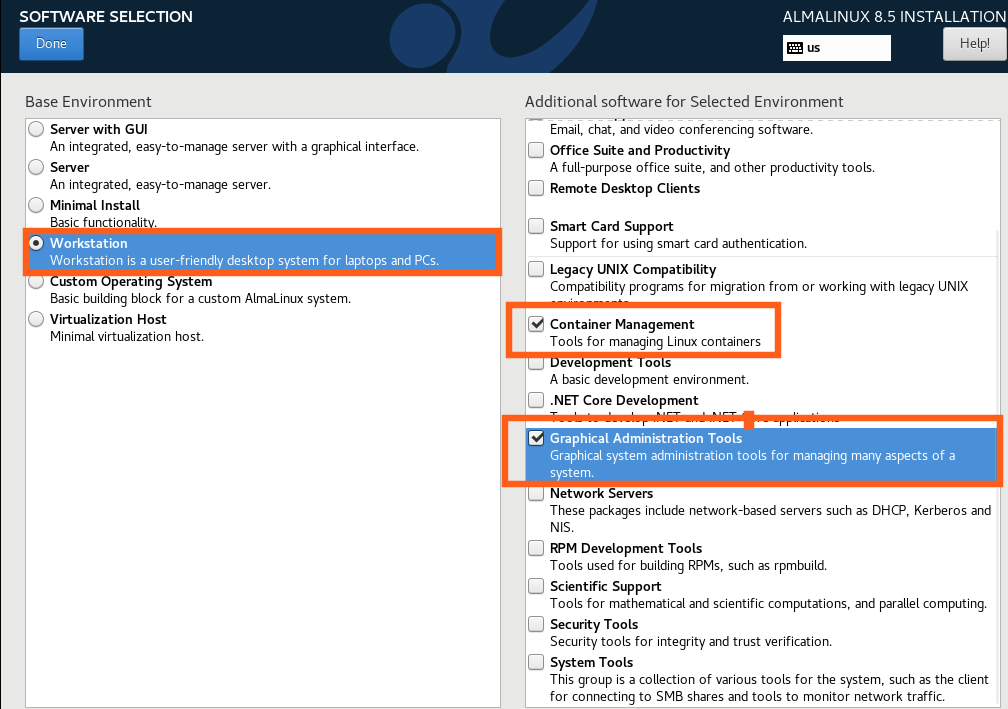
Under SOFTWARE menu software selection, I have selected Workstation on the left base environment and selected Graphical admin tools and Container Management Tools according to my requirement to handle the Linux system.
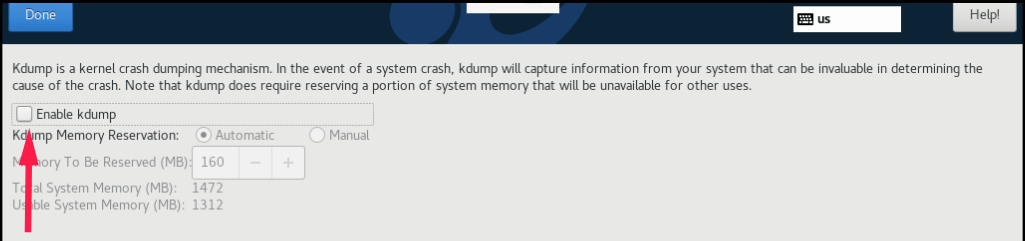
3 To save memory disable kdump
Next, You can save memory to uncheck Enable Kdump Section.
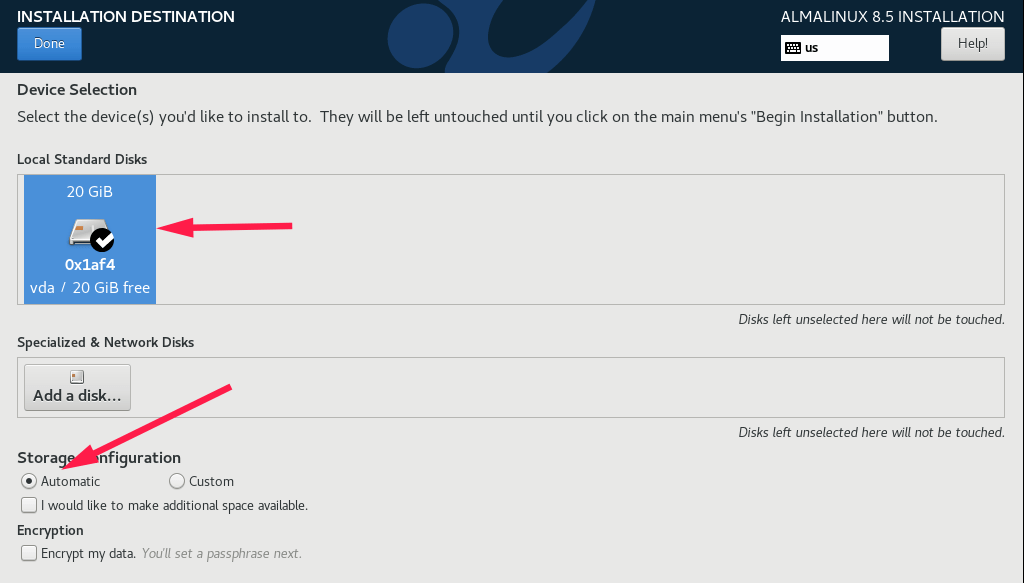
4. Select Installation Destination
Choose disks or partitions for installation after selection of installation destination. We can configure storage configuration through automatic and custom partitions. Currently In my virtual machine only one disk, so I choose automatic partition.
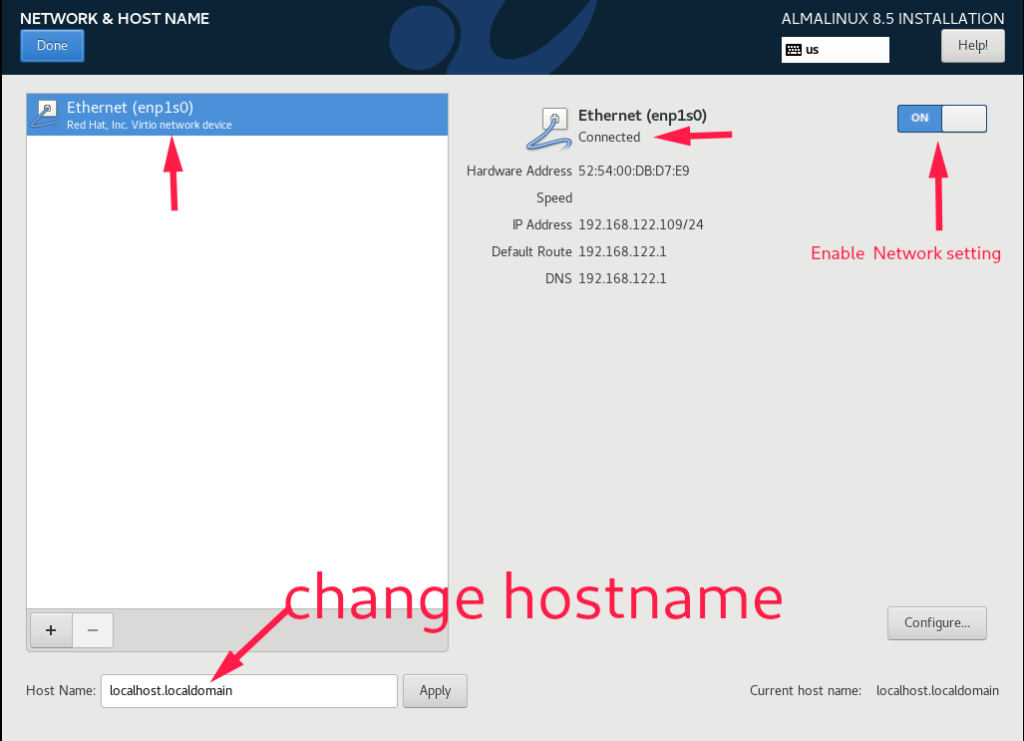
5 . Configure Network & Hostname settings
Enable your Network setting. The network will be connected automatically. Change your hostname if you wish.
6. Set Language , Date & Time
Set your preferred language which you want to use on the keyboard and in support, after set Time Zone and date, time. Please refer to the image in the setting.
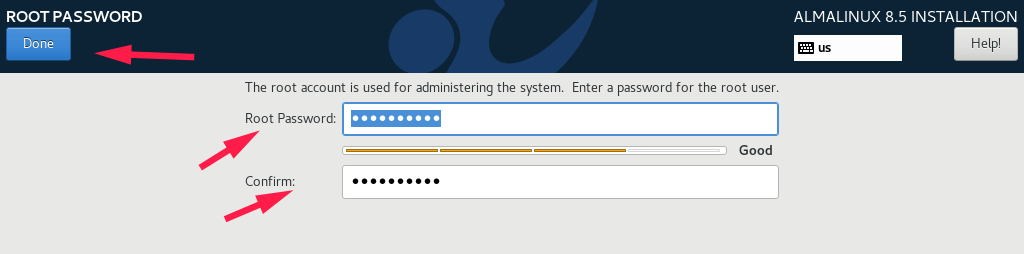
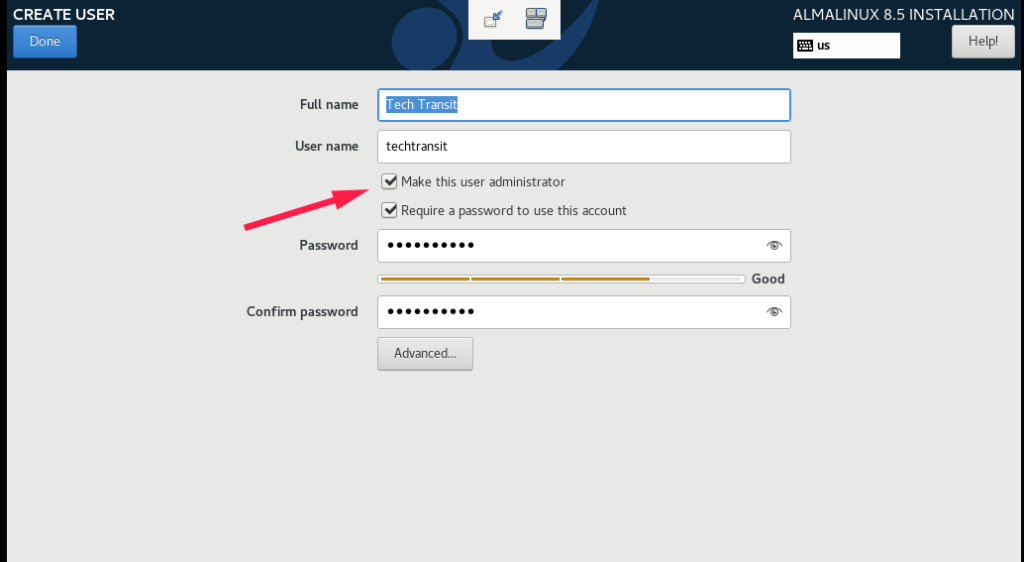
7. Set the root password and Create your user account
the root is the super use of Linux OS. Click on the root password and set and create one user account as well that you can create by clicking on the user creation tab, you can create this user as an administrator, this will be working as an administrative privilege through the Sudo command.
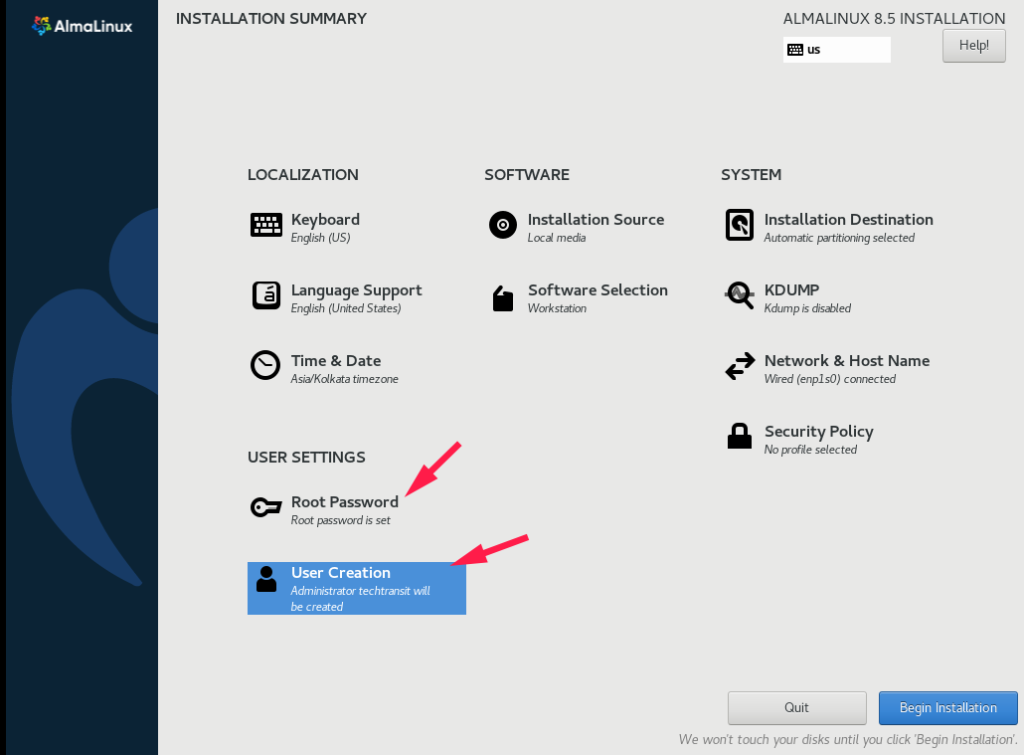
All is set, Start clicking on the Begin Installation. The installation will be complete after some time. The Reboot button will appear at the end and be highlighted. So Reboot it when done.

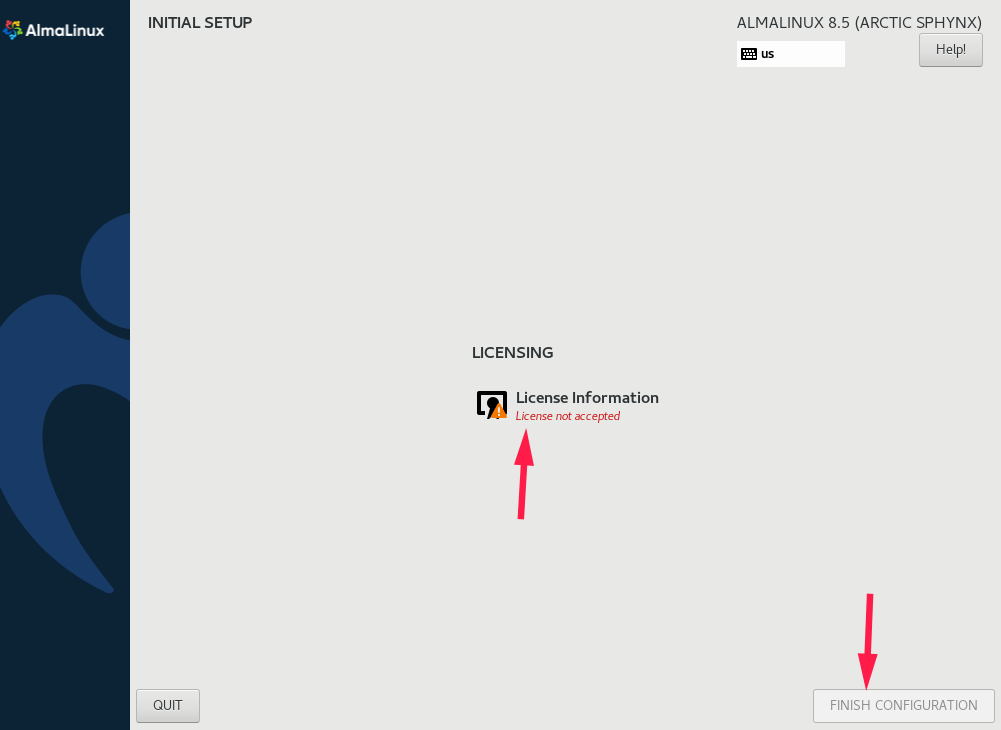
After the system reboots, click License Information and accept the license agreement under the text of the license and Finish Configuration.
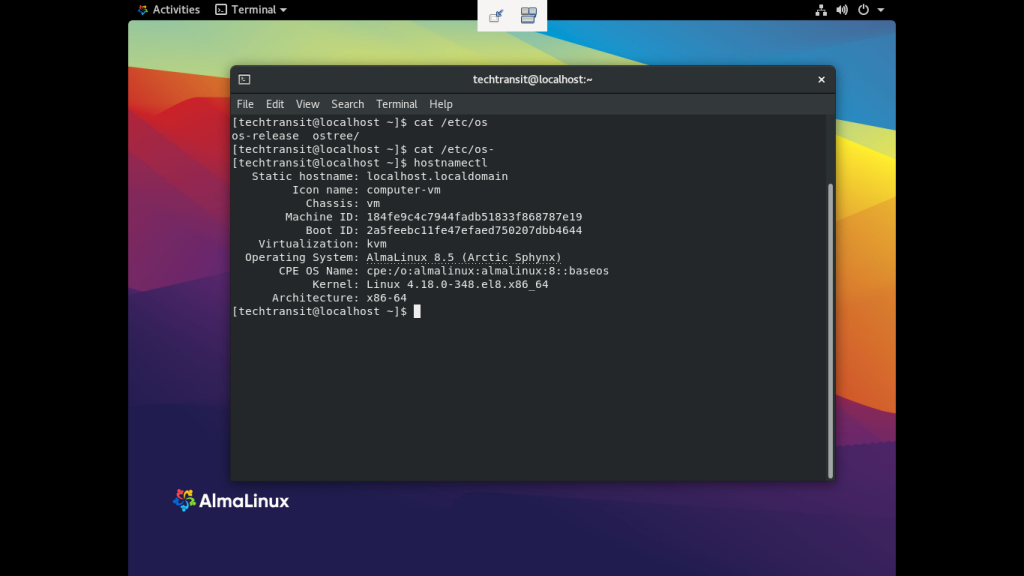
AlmaLinux Welcome Screen After User Login
Conclusion
In this post article, I created detailed step-by-step instructions on how to install AlmaLinux with screenshots. If you have any views, let me know through comments.