
Last Updated on 4 months ago by Sachin G
If you’re looking for a free, reliable, and enterprise-grade Linux distribution, AlmaLinux 8 stands out as one of the top choices. Built by the AlmaLinux OS Foundation as a CentOS replacement, AlmaLinux provides long-term stability, community support, and full binary compatibility with Red Hat Enterprise Linux (RHEL).
AlmaLinux is the latest Free Linux-based Operating system. It is a community-driven open-source project built from the source code of Red Hat Enterprise Linux (RHEL). After CentOS Linux died, AlmaLinux came into play. This OS is an enterprise server Operating system and a stable Linux distribution. AlmaLinux comes with a long end-of-life window.
In this guide, we’ll walk you through how to install AlmaLinux 8 step by step — whether you’re a beginner, sysadmin, or deploying it on a VPS or dedicated server. This article includes screenshots, BIOS/UEFI options, USB boot methods, and best practices — all crafted from real-world installation experiences.
Download the AlmaLinux 8 ISO
Currently, AlmaLinux is no-cost or Free available on different Architecture like x86_64, aarch64, and ppc64le. You can download it according to your hardware. You can get the latest ISO from below official AlmaLinux website. Choose the minimal ISO for a lightweight setup or the full ISO for GUI-based systems.
System Requirements for AlmaLinux 8
Before diving into the AlmaLinux installation process, ensure your system meets the following minimum specs:
- CPU: 1.1 GHz or faster 64-bit processor
- RAM: Minimum 2 GB (4 GB recommended)
- Disk Space: 20 GB (minimum)
- Bootable media: USB/DVD
- UEFI/BIOS support
Pro Tip: Use virtualization tools like VirtualBox, VMware, or KVM if you’re just testing the OS.
Step 1: Create a Bootable USB
Use tools like Rufus (Windows) or Etcher (Linux/macOS) to create a bootable USB.
Make sure to select the correct USB drive before writing the ISO!
Step 2: Boot and Begin Installation
Insert the USB into your system and boot. Depending on your system, enter the BIOS/UEFI settings (usually with F2, F10, or DEL) and set the USB as the first boot device.
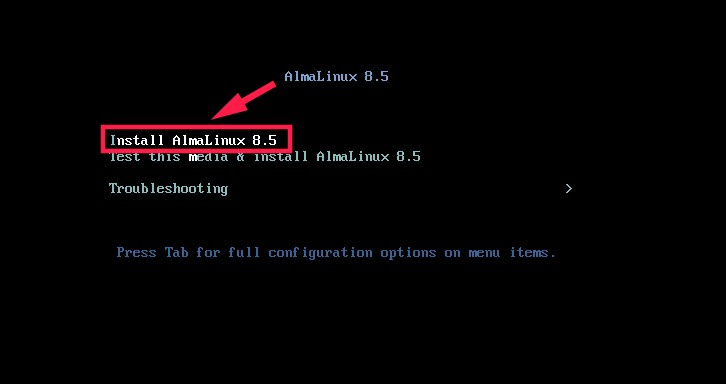
Here, you’ll see the AlmaLinux 8 installation menu. Choose Install AlmaLinux 8
Step 3: Configure Installation Options
During the installation wizard:
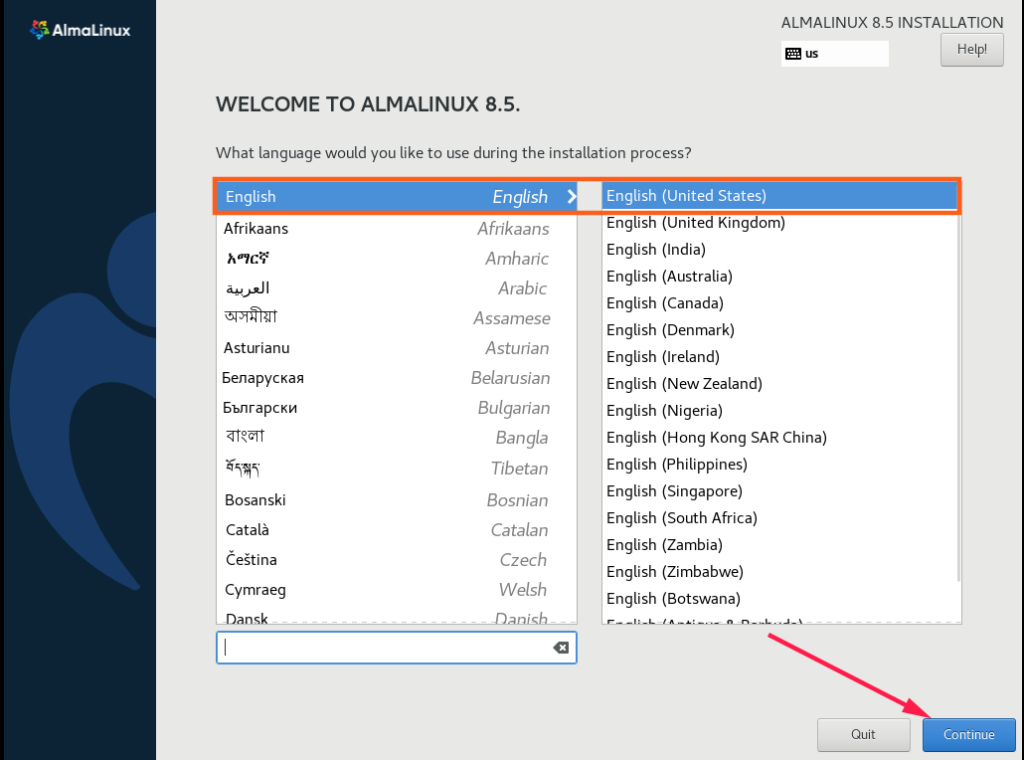
- Language: Choose your preferred language
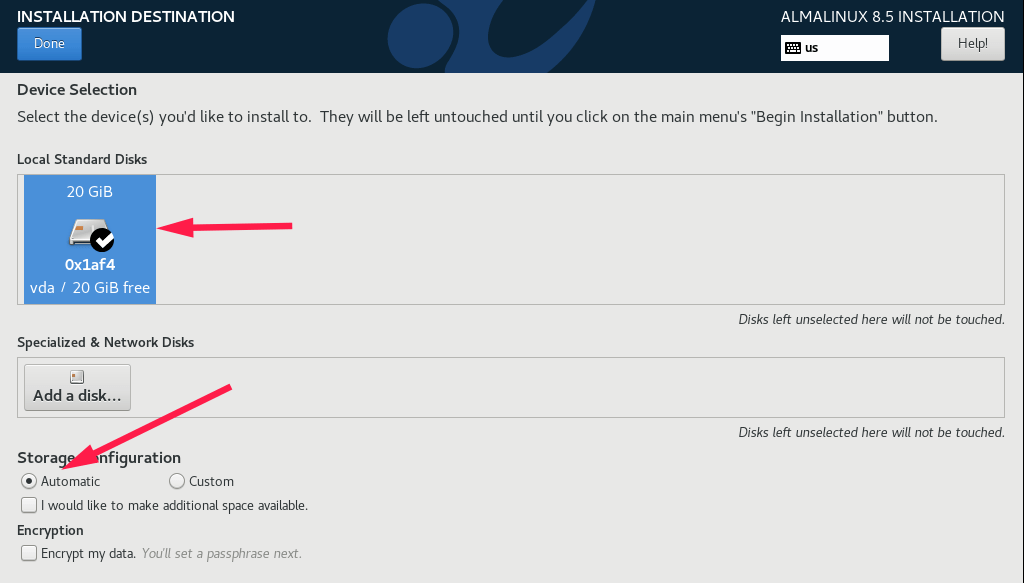
- Installation Destination: Select disk and partitioning (auto/manual)
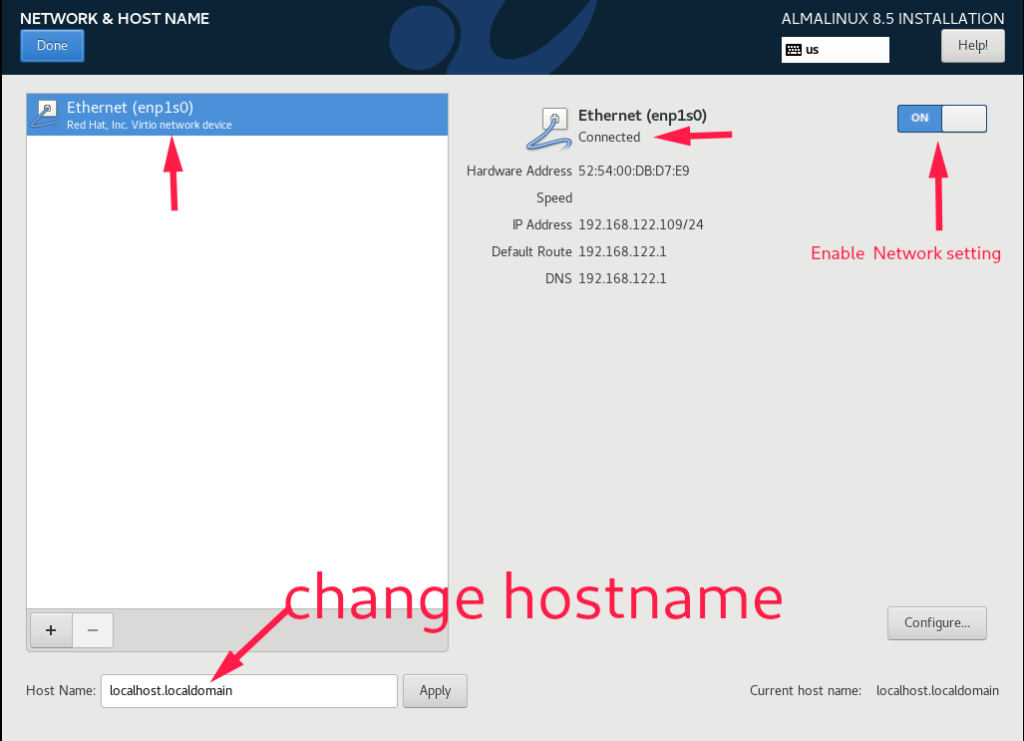
- Network & Hostname: Enable network and set hostname
- Software Selection: Choose “Minimal Install” or “Server with GUI”
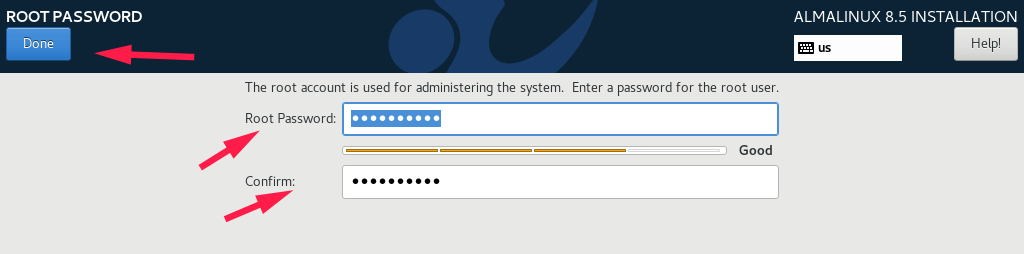
- Root Password/User Creation: Set up credentials
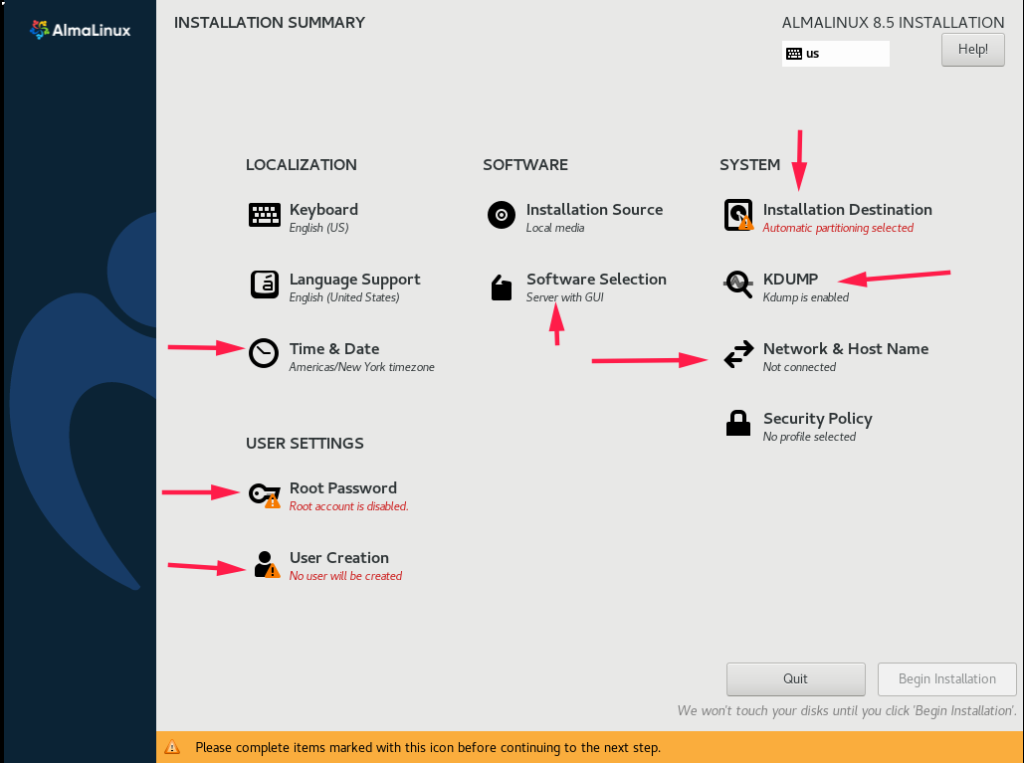
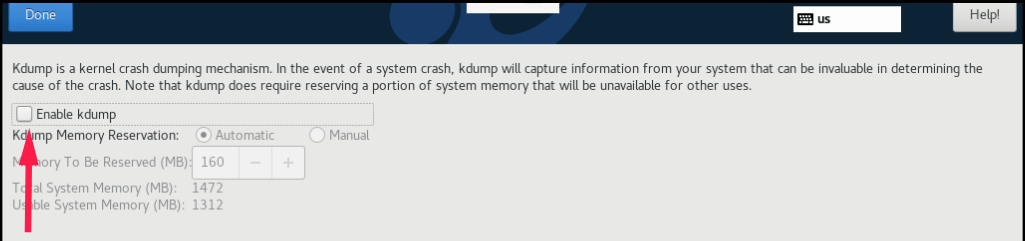
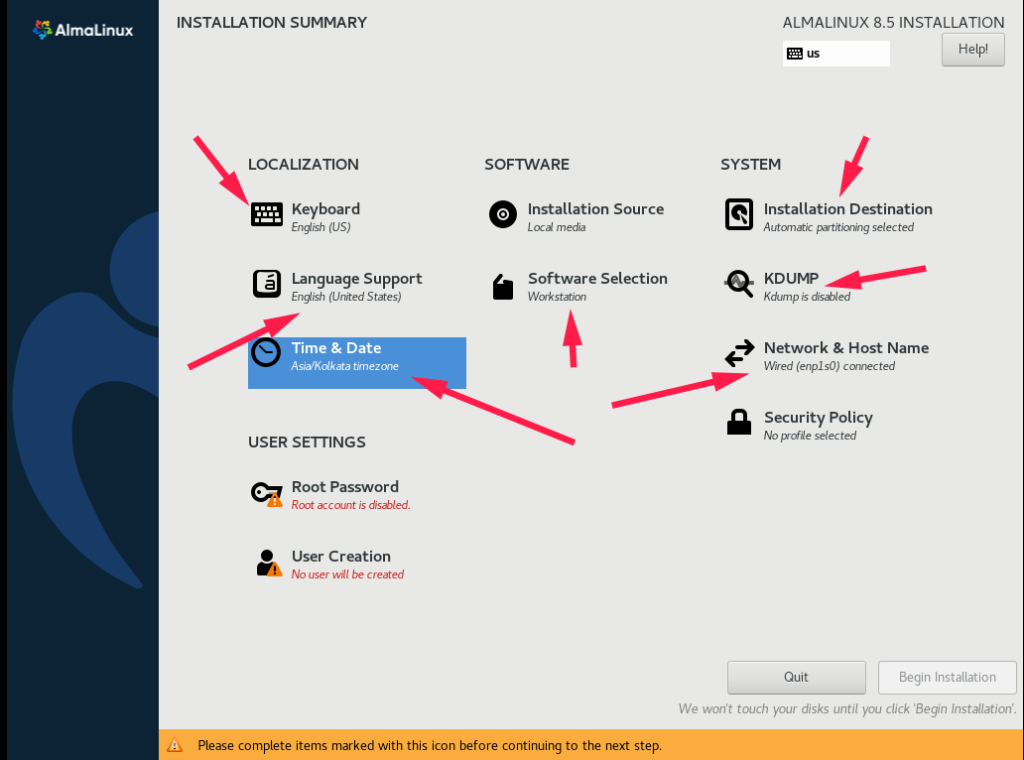
AlmaLinux 8 gives us an options to set location, Date and Time . In the software section , i have choosen Server workstation base environment . In the System section there is an installation destination. You can choose to customize your partition or Automatic partioning select.
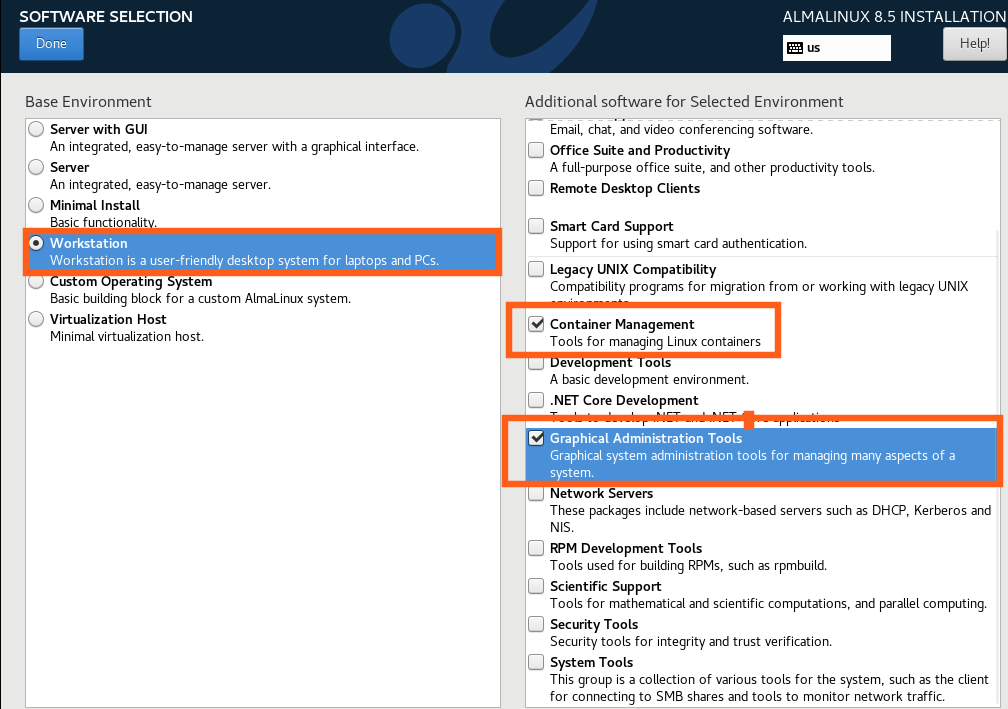
Under the SOFTWARE section in the installation menu, I selected Workstation as the base environment on the left. Based on my requirements for managing the Linux system, I also chose Graphical Administration Tools and Container Management Tools from the list of additional options.
Choose disks or partitions for installation after selection of installation destination. We can configure storage configuration through automatic and custom partitions. Currently In my virtual machine only one disk, so I choose automatic partition.
Enable your Network setting.
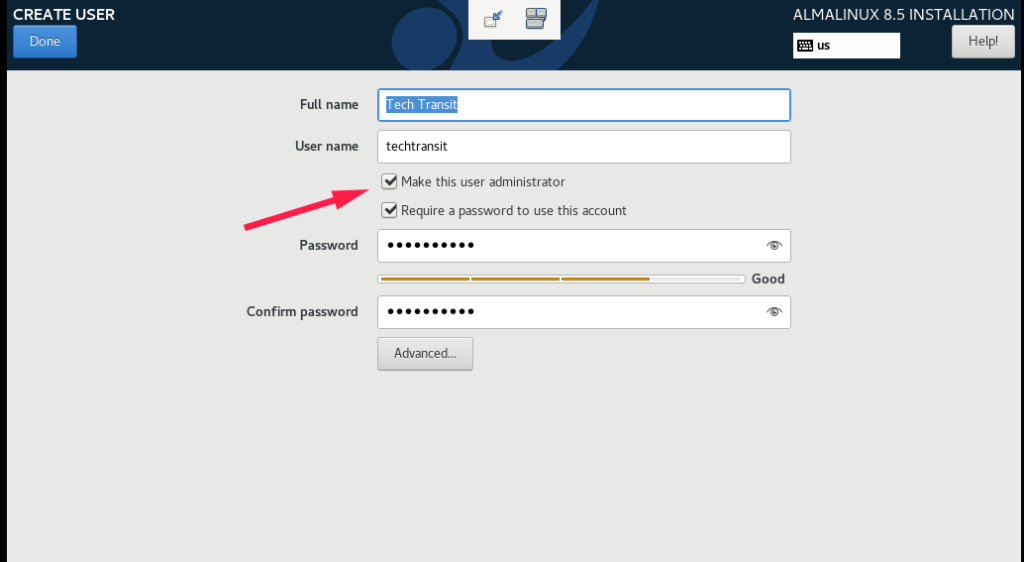
the root is the super use of Linux OS. Click on the root password and set and create one user account as well that you can create by clicking on the user creation tab, you can create this user as an administrator, this will be working as an administrative privilege through the Sudo command.
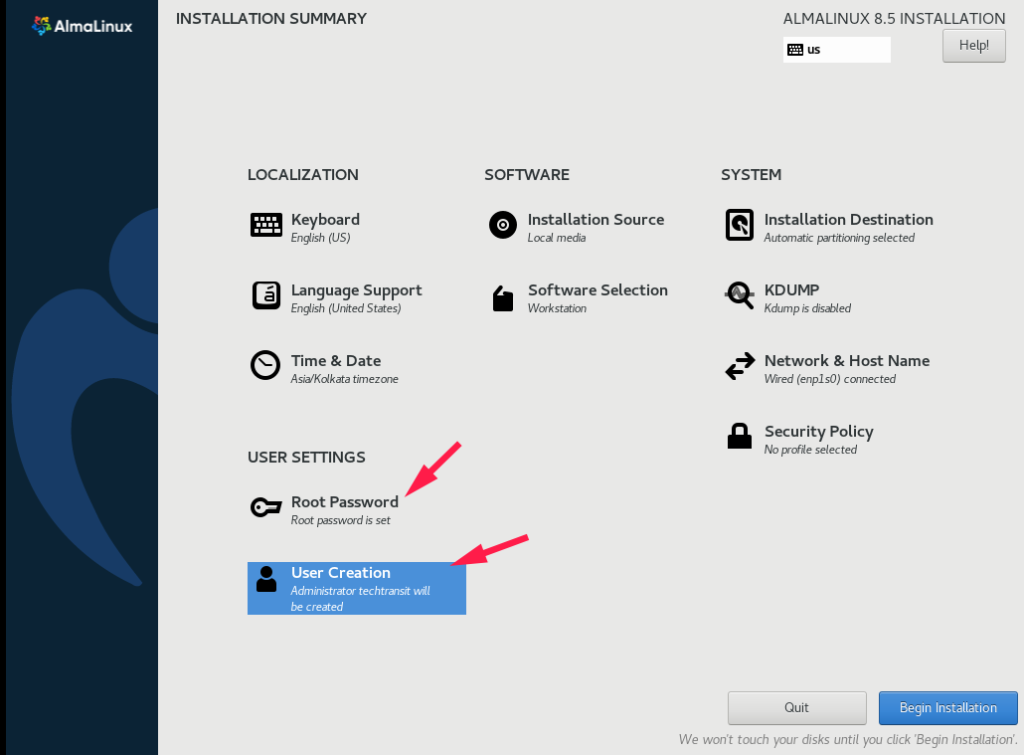
All is set, Start clicking on the Begin Installation. The installation will be complete after some time. The Reboot button will appear at the end and be highlighted. So Reboot it when done.

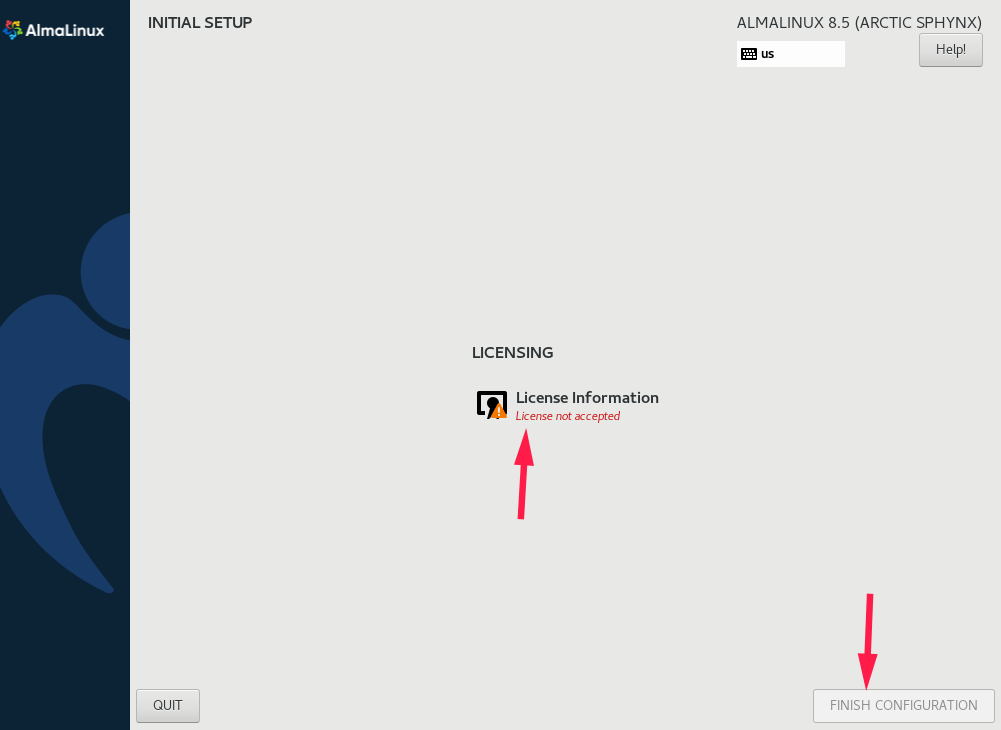
After the system reboots, click License Information and accept the license agreement under the text of the license and Finish Configuration.
Step 4: Complete the Installation
Reboot the system and remove the USB.
AlmaLinux Welcome Screen After User Login
Congratulations! You’ve successfully installed AlmaLinux 8.
AlmaLinux vs CentOS and Rocky Linux: What to Choose?
AlmaLinux and Rocky Linux are both RHEL-based Linux distributions. If you’re migrating from CentOS, both are excellent choices. AlmaLinux is maintained by the community-driven AlmaLinux OS Foundation, with regular updates and an active ecosystem.
Who Should Use AlmaLinux 8?
AlmaLinux 8 is ideal for:
- Web hosting environments
- cPanel or CyberPanel users
- Enterprise-grade applications
- Developers testing RHEL-compatible software
- System administrators seeking long-term stability
Platforms like Udemy and Linux Foundation also provide courses on RHEL-based system administration — which work perfectly with AlmaLinux!
FAQ – AlmaLinux 8 Installation
Absolutely. AlmaLinux provides a migration tool that lets you convert your CentOS 8 system easily.
Yes, you can install GUI during the setup or post-install using dnf groupinstall "Server with GUI".
Yes, it’s RHEL-compatible and trusted by enterprises for production-grade environments.

I’m Sachin Gupta — a freelance IT support specialist and founder of techtransit.org. I’m certified in Linux, Ansible, OpenShift (Red Hat), cPanel, and ITIL, with over 15 years of hands-on experience. I create beginner-friendly Linux tutorials, help with Ansible automation, and offer IT support on platforms like Upwork, Freelancer, and PeoplePerHour. Follow Tech Transit for practical tips, hosting guides, and real-world Linux expertise!