
Last Updated on 3 weeks by Sachin G
Installing OBS Studio on Ubuntu has never been easier, whether you’re running Ubuntu 22.04, 24.04, or preparing for upcoming desktop releases. In this guide, we’ll cover two proven methods to install OBS Studio on Ubuntu: via the Ubuntu Software Center for beginners and through the PPA repository for users who prefer the terminal and want the latest version.
OBS Studio (Open Broadcaster Software) is a free, open-source, and highly versatile tool designed for screen recording and live streaming. It is widely used by content creators, gamers, and professionals for broadcasting to platforms like YouTube, Twitch, and Facebook Live. Built using C and C++, OBS Studio delivers performance-driven features for real-time video/audio capturing and encoding.
So why install OBS Studio on Ubuntu? Because it combines powerful functionality with cross-platform compatibility. Here are some standout features:
- Cross-platform support: Works seamlessly on Linux, Windows, and macOS.
- Real-time screen capture: Perfect for live streaming, online tutorials, or gaming content creation.
- Scene management: Create multiple scenes and switch between them for professional-level video production.
- Studio Mode: Preview scenes before going live for smooth, polished transitions.
- Custom hotkeys: Streamline your workflow with personalized shortcuts.
In short, OBS Studio on Ubuntu is a must-have for anyone serious about content creation or streaming on Linux systems.
In this tutorial, I’ll show you step-by-step how to install OBS Studio on Ubuntu 22.04 and 24.04, using two methods:
✅ Installation via Ubuntu Software Center (the easiest option)
✅ Installation through the PPA repository (for the latest features)
Choose the method that works best for your workflow, and let’s get started!
Why Install OBS Studio on Ubuntu?
OBS Studio is more than just screen recording software—it’s a full-featured, open-source broadcasting tool that allows you to:
- Stream to platforms like YouTube, Twitch, Facebook Live.
- Record your desktop, applications, or webcam.
- Add multiple audio/video sources and filters.
- Configure advanced features like hardware encoding and hotkeys.
If you’re into content creation, game streaming, or remote presentations, OBS Studio is a must-have on your Ubuntu desktop.
System Requirements for OBS Studio on Ubuntu
Before installation, make sure your system meets these requirements:
| Component | Minimum Requirement |
|---|---|
| OS | Ubuntu 20.04 or newer |
| CPU | Intel i5 or AMD FX series |
| RAM | 4 GB (8 GB recommended) |
| GPU | OpenGL 3.3 or newer |
| Internet | Needed for streaming |
Tip: If you plan to stream in 1080p or 4K, invest in a dedicated GPU for hardware acceleration.
Method 1: Install OBS Studio via Ubuntu Software Center
The easiest way to install OBS Studio is through the Ubuntu Software Center. This method is perfect for beginners.
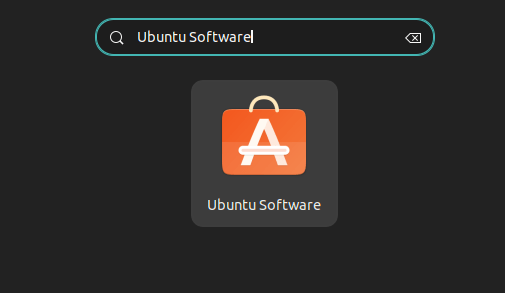
Step 1: Open Ubuntu Software Center
You can start by launching the Ubuntu Software Center. You can click on the Left Hand Side Activities Button or find it in the application launcher.
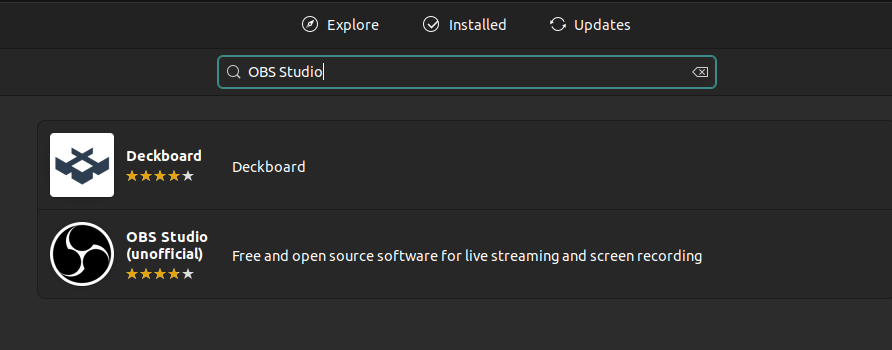
Step 2: Search for OBS Studio
Use the search bar in the top right corner. Type “OBS Studio” and press Enter. The application page will show on the full page with the install button.
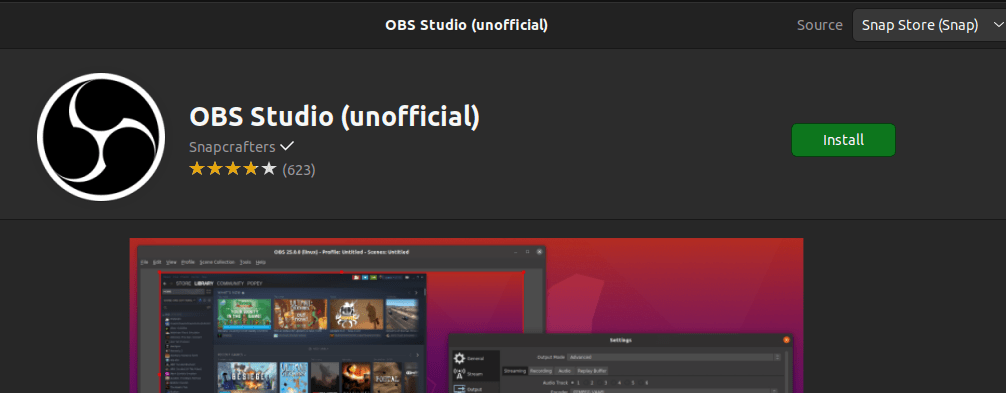
Step 3: Click on Install
Click on the Install Button to start the process of installing OBS. At the time of installation you will be asked for password authentication during the installation, You will be prompted to enter your password for administrative privilege.
Pros of this Method:
- Simple and beginner-friendly.
- No terminal commands needed.
Cons:
- It might not give you the latest version of OBS Studio.
- Relies on Ubuntu’s official repository, which can lag behind OBS updates.
Method 2: Install OBS Studio Using the Official PPA (Latest Version)
If you want the latest OBS Studio version with new features and bug fixes, the PPA method is the best choice.
Step 1: Launch Terminal :
Open the Terminal on your Ubuntu by searching for “Terminal” in the application launcher.
Step 2: Add OBS Studio PPA
Execute the following commands to add the OBS Studio PPA (Personal Package Archive) to your system and update the package index list.
sudo add-apt-repository ppa:obsproject/obs-studio
sudo apt-get update
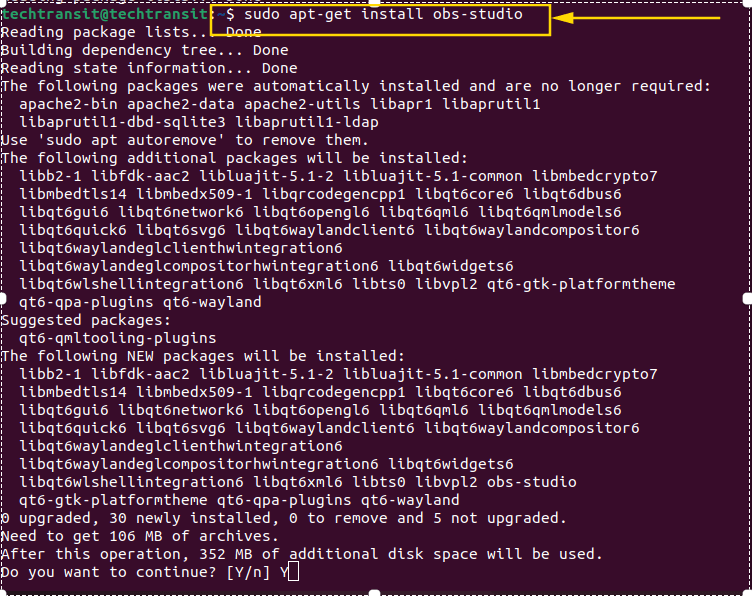
Step 3: Install OBS Studio
Now, install Studio using the following command. You will be asked for confirmation then you can press Y to proceed with installation.
sudo apt-get install obs-studio
➡ Want to master Linux beyond installation?
If you want to go deeper into Linux, DevOps, and automation, I’ve curated a list of Recommended Courses here. They’re structured, beginner-friendly, and perfect for building real-world skills.
Step 4: Launch & Configure
Once the installation is complete, you can launch OBS Studio. Either search for it in your application launcher or run the following command in the Terminal. Upon launching OBS Studio, you’ll be prompted to configure your settings. Take a moment to set up your preferred recording or streaming configurations.
obs-studio
How to Update OBS Studio on Ubuntu
- If installed via Software Center: Updates come with system updates.
- If installed via PPA: Run:
sudo apt update && sudo apt upgradeThis will fetch the latest OBS version from the PPA.
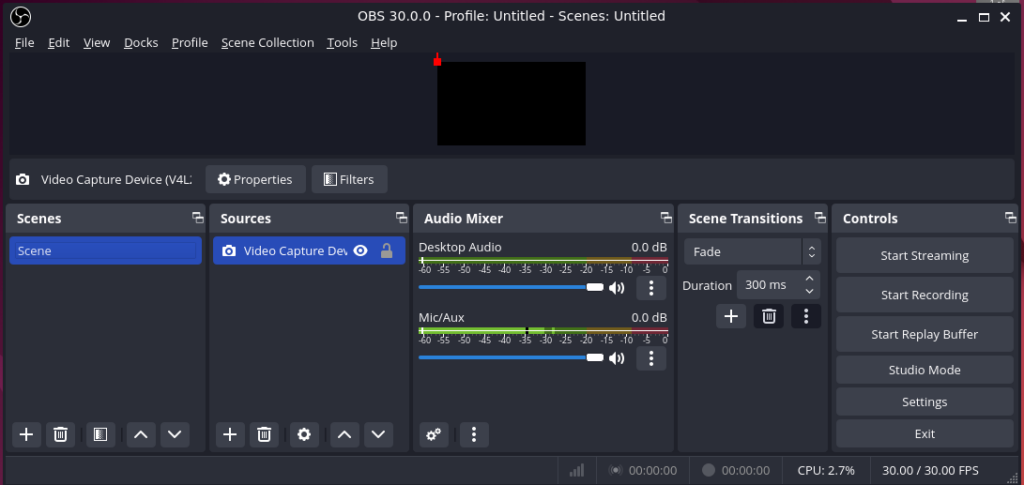
Launching and Setting Up OBS Studio
Once installed, open OBS Studio and configure:
- Video resolution (e.g., 1920×1080 for Full HD)
- Frame rate (30 FPS or 60 FPS for smoother streaming)
- Audio input/output devices
- Add Sources like Screen Capture, Window Capture, or Webcam.
Pro Tip: Use the Auto-Configuration Wizard (available under Tools) to optimize settings for your system.
Common Issues and Fixes
- OBS window black screen?
Enable Xorg display server or check GPU drivers. - Low performance during streaming?
Lower the resolution or use hardware encoding (NVENC or VAAPI) if your GPU supports it.
Real Use Cases of OBS on Ubuntu
- Content Creators: Record tutorials and courses.
- Gamers: Stream gameplay to Twitch or YouTube.
- Developers: Host live coding sessions.
- Businesses: Conduct webinars and presentations.
FAQs – OBS Studio on Ubuntu
The PPA method is better because it provides the latest OBS Studio version.
sudo apt remove –purge obs-studio
Yes, but screen capture options are limited. For better compatibility, use Xorg.
Yes, OBS Studio is open-source and completely free.
Best Practices for OBS Studio on Linux
- Use hardware acceleration for smoother streaming.
- Configure hotkeys for quick scene switching.
- Record to an SSD for better performance.
- Regularly update OBS to avoid security issues.
Installing OBS Studio on Ubuntu is simple, whether you use the Ubuntu Software Center or the official PPA method. For casual users, the Software Center method is fine, but if you need the latest features, go with the PPA.

I’m Sachin Gupta — a freelance IT support specialist and founder of techtransit.org. I’m certified in Linux, Ansible, OpenShift (Red Hat), cPanel, and ITIL, with over 15 years of hands-on experience. I create beginner-friendly Linux tutorials, help with Ansible automation, and offer IT support on platforms like Upwork, Freelancer, and PeoplePerHour. Follow Tech Transit for practical tips, hosting guides, and real-world Linux expertise!