
Last Updated on 3 days by Sachin G
Red Hat Enterprise Linux (RHEL) is a powerful and versatile operating system renowned for its stability, security, and performance. However, before embarking on your journey with RHEL, mastering the installation process is paramount. Whether you’re an IT professional or just starting your Linux journey, installing RHEL can unlock a world of possibilities.
In this guide, I’ll walk you through the Installation of Red Hat Enterprise Linux 9 (RHEL 9) with screenshots, practical tips, and real-world advice. Whether you are setting up a development environment on VMware or VirtualBox or preparing a production-ready server, this tutorial will make the process easier for you.
Why Choose RHEL 9 for Your Environment?
Red Hat Enterprise Linux is a leading enterprise distribution trusted for its stability, security, and long-term support. Organizations use it for mission-critical servers, cloud infrastructure, and DevOps environments.
RHEL 9 brings:
- Enhanced security with SELinux improvements.
- Support for the latest hardware and cloud platforms.
- A streamlined Anaconda installer for smooth installation.
- Optimized performance for enterprise workloads.
If you’re aiming for Linux system administration or a DevOps career, learning how to install RHEL 9 is a must-have skill.
System Requirements for RHEL 9
Before you begin, ensure your system meets the minimum hardware requirements:
- Red Hat Enterprise Linux is mostly available on the following architectures. RHEL supports 64-bit architectures.
- 64-bit AMD
- 64-bit Intel
- IBM POWER
- IBM System
| Component | Minimum Requirement |
|---|---|
| CPU | 2 GHz or faster |
| RAM | 2 GB (4 GB recommended) |
| Disk Space | 20 GB (50 GB recommended for server) |
| Network | Ethernet or Wi-Fi |
Tip: If you are installing on a virtual machine (VMware/VirtualBox), allocate at least 2 CPUs, 4 GB RAM, and 40 GB disk for a smooth experience.
Step 1: How to Download Red Hat Enterprise Linux ( RHEL ) DVD ISO
Downloading the RHEL DVD ISO image is the first step towards deploying this powerful OS on your system. In this guide, we’ll walk you through the process of downloading the RHEL DVD ISO image, ensuring a smooth and hassle-free experience.
Start by navigating to the Red Hat website Web page, CLICK HERE. This is where you’ll find the authorized source for downloading RHEL DVD ISO images. On the RHEL download page, you’ll find various versions and editions of RHEL, including RHEL Server, RHEL Workstation, and RHEL for Edge Computing. Select the version and edition that best suits your requirements and click on the corresponding download link.
To inspire developers, rejoice! Red Hat offers a No-cost RHEL Developer Subscription. This subscription gives you access to a wealth of resources, empowering you to experiment, innovate, and build exceptional applications. Before proceeding to download No-cost for developers for business purposes, it is advisable to familiarize yourself with the relevant norms. Access the information here.
Step 2: Create a Bootable Media or Set up a Virtual Machine
If you are installing on physical hardware, create a bootable USB using tools like Rufus or Etcher.
For VMware or VirtualBox, create a new virtual machine:
- Select Linux → Red Hat (64-bit) as OS type.
- Attach the downloaded RHEL 9 ISO as the boot disk.
Pro Tip:
VirtualBox is great for learning, while VMware Workstation/ESXi is ideal for real-world simulation.
Step 3: Boot and Start RHEL 9 Installation (Anaconda Installer)
Once your system boots from the ISO, you’ll see the Anaconda installer.
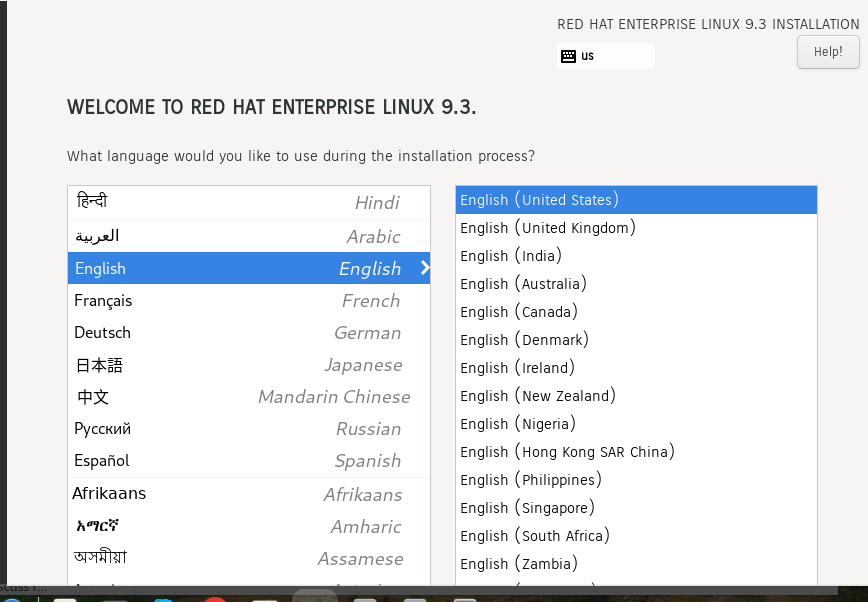
- Select Install Red Hat Enterprise Linux 9.
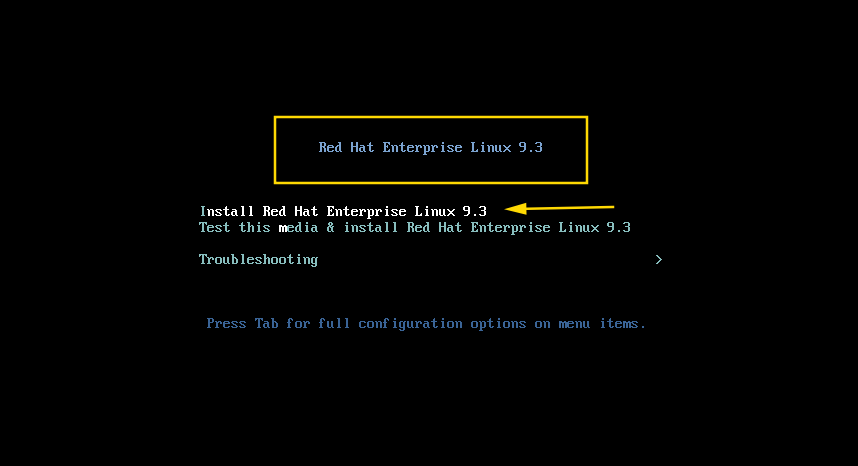
2. Choose your preferred language and keyboard layout.
3. Click Continue to enter the main installation summary screen.
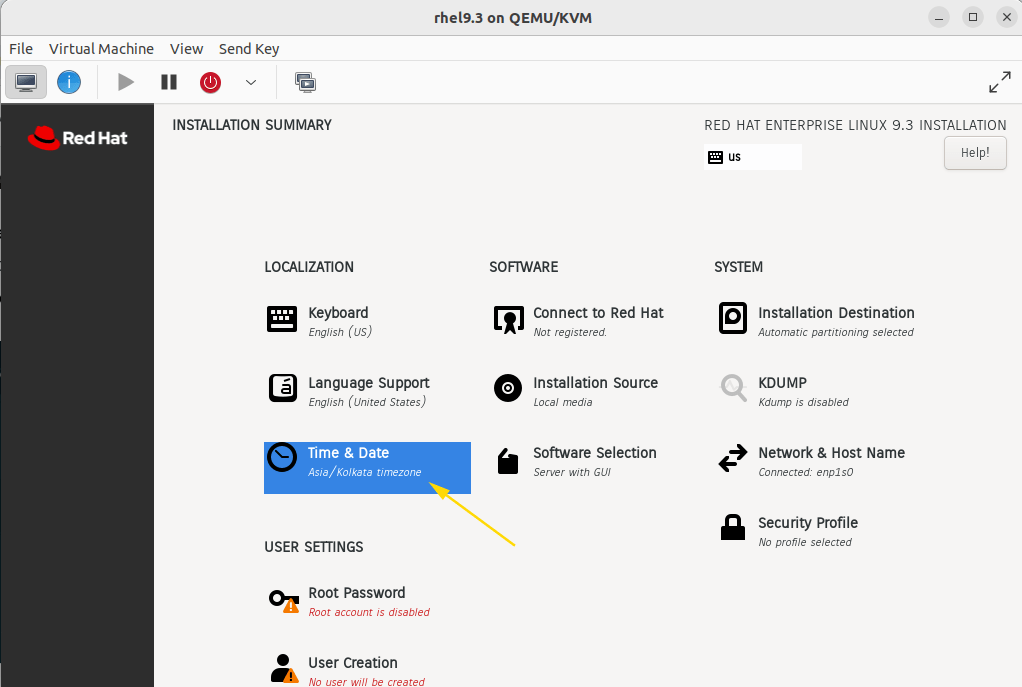
Step 4: Configure Installation Settings
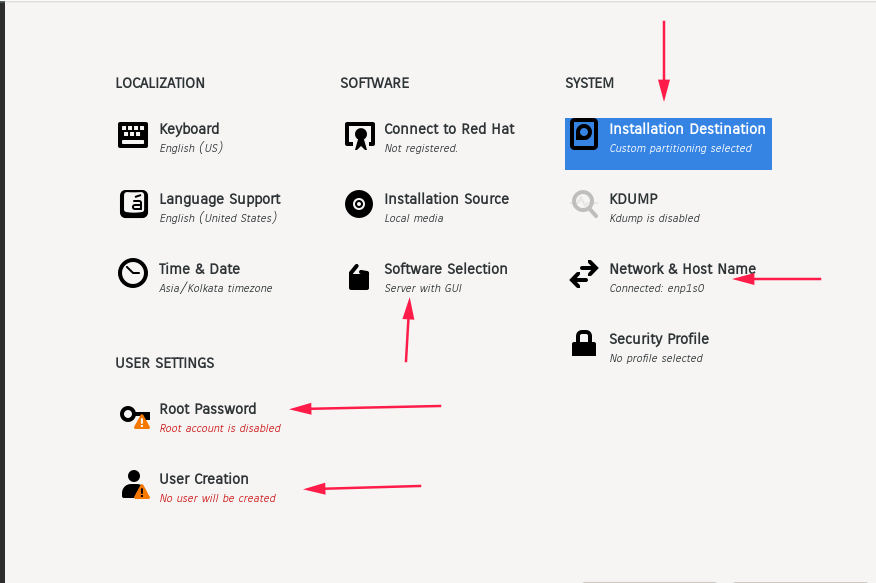
On the Installation Summary page, configure the following:
a) Installation Destination
- Select the target disk.
- Choose Automatic Partitioning (recommended for beginners) or Custom Partitioning for more control.
b) Network & Hostname
- Enable network (important for registration).
- Set a hostname (e.g.,
server01.example.com).
c) Software Selection
- For servers, choose Server with GUI or Minimal Install.
- Minimal installation is ideal for production servers.
➡ Want to master Linux beyond installation?
If you want to go deeper into Linux, DevOps, and automation, I’ve curated a list of Recommended Courses here. They’re structured, beginner-friendly, and perfect for building real-world skills.
Partitioning and Disk Setup
One important step in installing RHEL is partitioning your disk and setting up the storage layout. You can choose either manual partitioning or guided partitioning with predefined layouts.
Make sure to allocate space for:
- Root (
/) partition - Home (
/home) partition - Swap space
- Any additional partitions your system needs
When you reach the partitioning section:
On the next screen, you can create and adjust partitions as per your requirements.
Select the disk where you want to install RHEL.
Choose “I will configure partitioning” if you want to set up partitions manually.
After making your choice, click the “Done” button at the top-left corner.

Select standard partition type
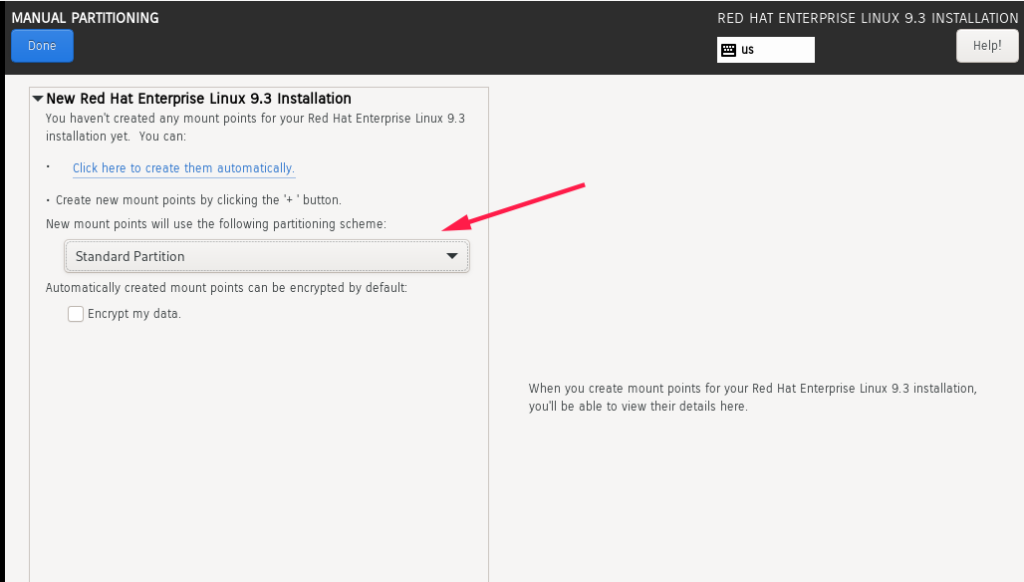
You can use the “+” icon to create a partition. You just need to specify the mount point and the size in MB or GB as desired. The best thing about RHEL is that when you bring your mouse over to the text box, it will show you how and what values need to be supplied.
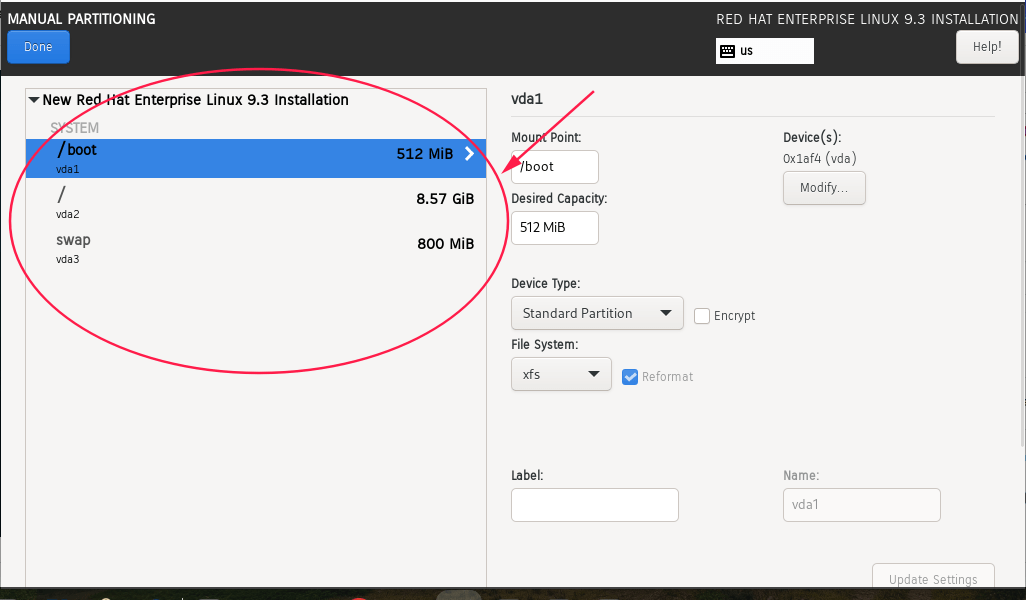
I have only created /, boot, and swapped the basic partition. So that you can have an idea about the procedure, you can select disk partition space according to your need. The Installation Destination option looks without a notice sign. After that, you have to set root user password as well create a create a user and update settings as required.
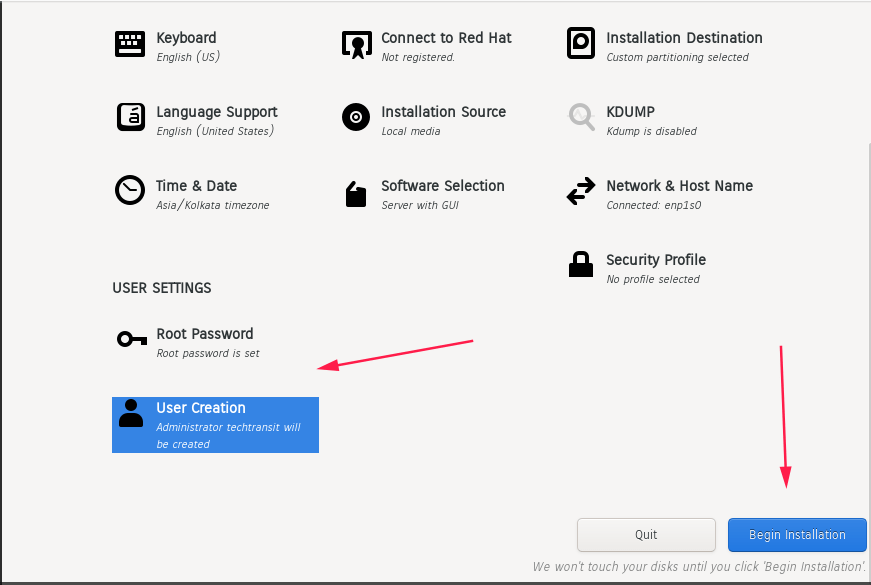
Step 5: Begin Installation and Set Root Password
Click Begin Installation. While it installs:
- Set the Root Password.
- Create a user account if needed.
Once the installation completes, reboot your system.
Step 6: Post-Installation Setup & Red Hat Subscription
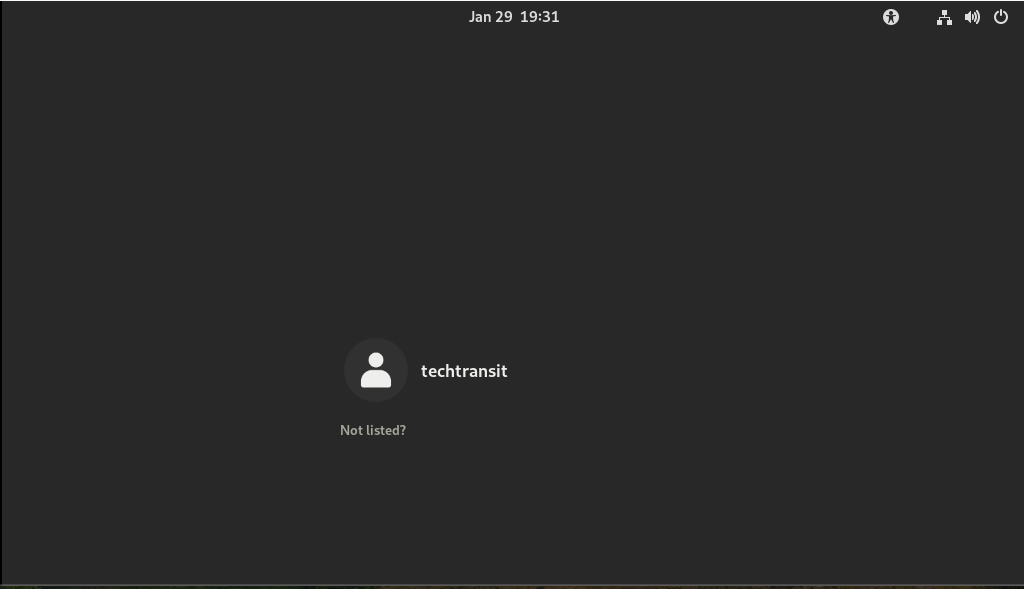
After the first boot:
- Log in as root or your user.
- Register your system:
subscription-manager registerAttach the subscription:
subscription-manager attach --autoThis ensures you get updates and security patches.
Common Questions (FAQ)
Yes, Red Hat offers a free developer subscription for personal and learning use.
RHEL is the upstream, enterprise-supported version, while CentOS Stream and Rocky Linux are community-driven alternatives.
Start with installation on VirtualBox or VMware, then move to real-world server setups.
Best Practices & Tips
- Always enable SELinux for security (unless testing requires otherwise).
- Use LVM partitioning for flexibility.
- Regularly update your system:
dnf update -yInstalling Red Hat Enterprise Linux 9 might seem challenging at first, but with a structured approach, it’s straightforward. Whether you’re setting up a development environment, a production server, or just practicing for RHCSA certification, this guide covers all the essentials.
Best Linux Courses for Beginners & Professionals

Complete Linux Training Course to Get Your Dream IT Job 2025
This course introduces Ansible to the absolute beginner in DevOps. Practice Ansible with coding exercises in browser.
Level: Beginner
Check It Out →
Linux Administration: The Complete Linux Bootcamp in 2025
Linux Sysadmin for Beginners. Get the Linux skills to boost your career and get hired. Quizzes, Projects, Challenges.
Level: Beginner
Check It Out →
Comptia Linux+ Certification | CompTIA Linux XK0-005 Lab
CompTIA Linux XK0-005 exam prep lab to get Comptia Linux+ Certification and differentiate yourself with Linux+ in IT.
Level: Beginner
Check It Out →
Linux Foundation Certified Systems Administrator – LFCS
Prepare for the Linux Foundation Certified System Administrator (LFCS) Exam.
Level: Beginner
Check It Out →
I’m Sachin Gupta — a freelance IT support specialist and founder of techtransit.org. I’m certified in Linux, Ansible, OpenShift (Red Hat), cPanel, and ITIL, with over 15 years of hands-on experience. I create beginner-friendly Linux tutorials, help with Ansible automation, and offer IT support on platforms like Upwork, Freelancer, and PeoplePerHour. Follow Tech Transit for practical tips, hosting guides, and real-world Linux expertise!