
Last Updated on 11 months ago by Sachin G
Virtualization on Linux has never been easier, thanks to the power and flexibility of KVM (Kernel-based Virtual Machine). Whether you’re running the stable Ubuntu 20.04 LTS, Ubuntu 24.04 Noble Numbat, or experimenting with Ubuntu 25.04, these steps will walk you through a full KVM setup — from system checks to launching your first VM with virt-manager GUI.
KVM (Kernel-based Virtual Machine) is a popular virtualization technology that allows multiple virtual machines into a single hardware machine, each of which has its the independent operating system. You can manage KVM from the command line with the virsh utility as well as graphically with web console virtual machine tool.
Prerequisites
Before you begin to install , you will need the following:
- A Ubuntu 24.04 server with at least 2GB of RAM with Extra RAM for your virtual machines.
- A working SSH client.
- 6 GB Disk Space and Additional for Virtual Machine as you require.
- Intel or AMD processor virtualization extensions are supported.
Here are the steps to determine whether your CPU supports virtualization extensions. Retrieve the svm or vmx CPU flag, which serves as an indicator of virtualization support on the host machine. The svm flag signifies the presence of AMD-V extensions on an AMD processor, while the vmx flag indicates virtualization support on an Intel processor. These flags play a crucial role in verifying the compatibility of your CPU with virtualization technologies.
Learn Smarter. Level Up Faster →
Want to master Linux, DevOps, Ansible, or Cloud workflows the smart way? I’ve curated a list of top-rated, real-world Udemy courses — based on student reviews and practical feedback.
Visit the Recommended Courses page to explore and enroll in courses trusted by the community.
See Curated Courses →Before installing the QEMU-KVM package, verify hardware compatibility:
Step 1: Check CPU Virtualization Support
Before installing KVM, confirm if your system supports VT-x (Intel) or AMD-V (AMD) virtualization:
egrep -c '(vmx|svm)' /proc/cpuinfo # Returns >0 if supportedAlternatively, install the kvm-ok verification tool:
sudo apt install cpu-checker -y && kvm-ok 
If you see “KVM acceleration can be used,” your CPU and BIOS are ready. If not, enable virtualization in BIOS/UEFI (look for VT-x or AMD-V).
Verify the KVM modules :
As an extra step, make sure to check if the computer’s kernel has the required kvm modules loaded by using the following command :
# lsmod | grep kvm
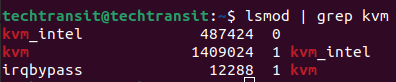
In the screenshot above, you can see that the module “kvm_intel” is loaded. Typically, the output can show either “kvm_intel” or “kvm_amd.”
BIOS virtualization check for Intel/AMD flags
Note: Skip these steps if facing KVM acceleration errors like "VT-x disabled".Step 2: Install KVM, QEMU, and Libvirt
Update and upgrade the Software Package
Update and upgrade the index package and install the latest version of the installed package. To do this run the following commands.
# sudo apt-get update; sudo apt-get upgrade -y
Install the core packages for KVM virtualization:
sudo apt install qemu-kvm libvirt-daemon-system libvirt-clients bridge-utils virt-manager virtinst cloud-image-utils ovmf -y
This includes the QEMU-KVM package, Libvirt daemon, and virt-manager GUI for easier VM management.
Version-Specific :
Ubuntu 22.04 virtualization:
sudo apt install qemu-efi # Legacy UEFI handling Ubuntu 24.04 KVM / 25.04 libvirt:
sudo apt install qemu-system-x86 libvirt-daemon # New package structure Step 3: Start and Enable Libvirt Service
Once KVM is installed, you need to enable it and ensure the libvirt service is running: To do this, run the following command:
sudo systemctl enable –now libvirtd
libvirtd daemon should run after the start and enable the service. If you see “Virsh connection failed” or “Permission denied libvirt”, it may be a group permission or service issue. Verify the status after running the services.
sudo systemctl status libvirtd
Step 4 : Verify Installation & Permissions
Check if the /dev/kvm device exists:
ls -la /dev/kvmIf it’s missing, check for SecureBoot conflicts, AppArmor denials, or BIOS virtualization check issues.
Also, make sure your user is in the libvirt group:
sudo usermod -aG libvirt $(whoami)
newgrp libvirt
Step 5 : Validate the System Host virtualization setup
Make sure to check if your virtualization setup has everything you need before creating a virtual machine. This utility validates that the system host is configured in a perfect way to run libvirt hypervisor drivers.
# virt-host-validate
At last, you should add current users to the KVM and libvirt groups so logged-in users can manage virtual machines through the command line as well as the graphical interface.
Step 6: Create Virtual Machines (Via GUI or CLI)
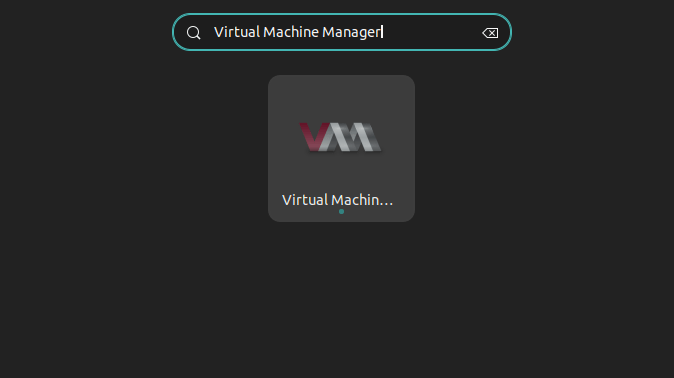
Using Virt-Manager GUI or Browse KVM Virtual Machines Manager
By virsh command line utility or virtue-manager GUI tools or search in the Ubuntu search console ‘Virtual machine Manager’ and open the tool and manage your virtualized machines.
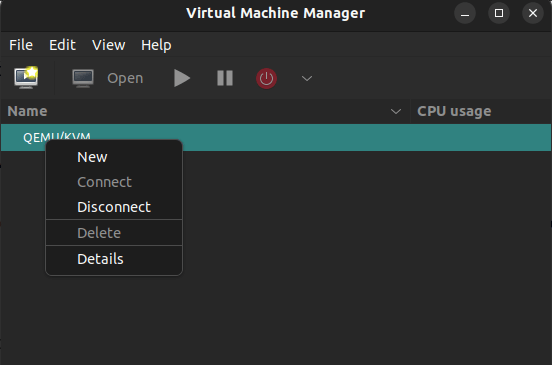
With KVM, now you can easily create and manage virtual machines, and you can use them for a variety of purposes, such as development, testing, and production. Here is one post to add the disk on KVM virtual machine.
Using Virt-install command:
virt-install \
--name ubuntu-vm \
--ram 2048 \
--vcpus 2 \
--disk path=/var/lib/libvirt/images/ubuntu.qcow2,size=20 \
--os-type linux \
--os-variant ubuntu24.04 \
--cdrom /path/to/ubuntu.iso \
--network network=default \
--graphics spice
Use SPICE/VNC setup for graphical output
Installing KVM on Ubuntu is straightforward when using the right tools. Whether you’re using virt-manager, libvirt, or CLI tools like virt-install, this setup empowers you with a fast, secure, and scalable virtualization platform. From cloud-init compatibility to PCI passthrough, Ubuntu + KVM offers powerful options for developers, testers, and sysadmins alike.

I’m Sachin Gupta — a freelance IT support specialist and founder of techtransit.org. I’m certified in Linux, Ansible, OpenShift (Red Hat), cPanel, and ITIL, with over 15 years of hands-on experience. I create beginner-friendly Linux tutorials, help with Ansible automation, and offer IT support on platforms like Upwork, Freelancer, and PeoplePerHour. Follow Tech Transit for practical tips, hosting guides, and real-world Linux expertise!