
Last Updated on 1 month by Sachin G
Skype is a widely used application where users engage in various forms of online communication including voice and video calls, instant messaging, and file sharing. This is a popular tool for business and personal communications. skype has various features and reasons to use. Some of the features are listed below :
- Video and Voice Calls
- Instant Messaging
- Conferencing and Group Calls
- Screen Sharing
- International Calls by Skype Credit
- Skype for Business
- Cross-Platform Compatibility
- Security & Privacy
Here I will share two methods to install Skype on the Ubuntu Linux Operating system distribution, Terminal ( Command Line ) and Software Center ( Graphical Interface ). Generally, skype is used graphically and users prefer graphical installation. which is popular and known for its user-friendly interface and robust security features. Here first we will walk through the graphical installation and ensure a hassle-free experience on your Operating system.
Graphical Installation Method
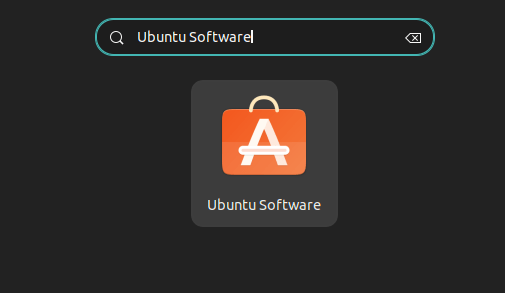
Step 1: Open Ubuntu Software Center
Start by launching the Ubuntu Software Center. You can click on the Left Hand Side Activities Button or find it in the application launcher by keyboard shortcut Super + A and searching for ” Ubuntu Software ” Open it.
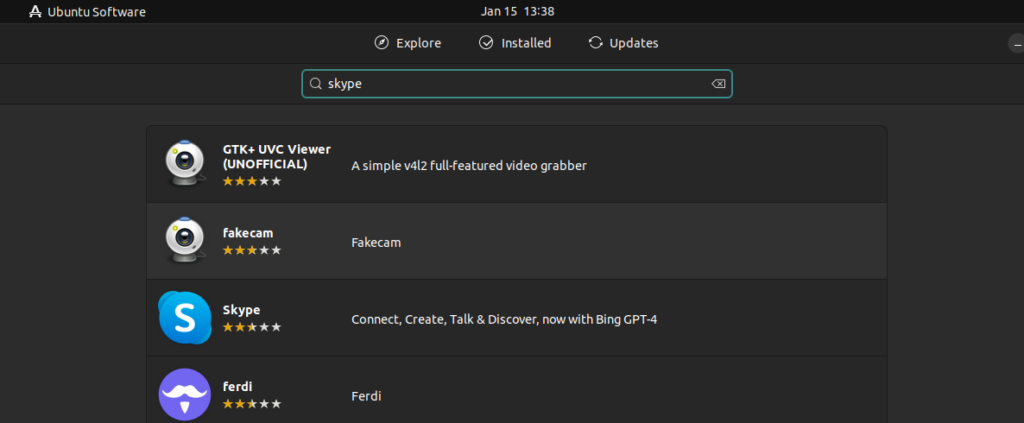
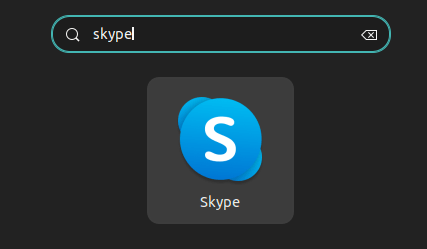
Step 2: Search for Skype
Once the Ubuntu Software Center is open, use the search bar in the top right corner. Type “Skype” and press Enter. The Skype application will show on display.
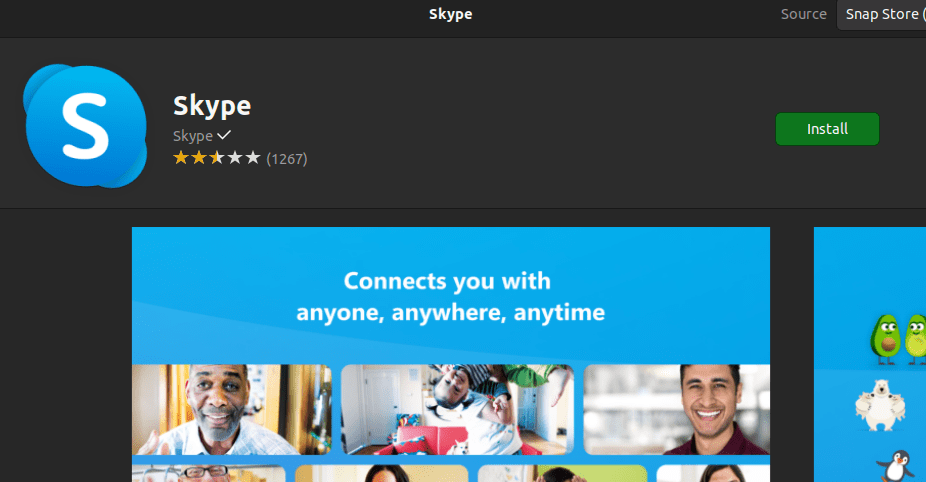
Step 3: Select Skype for Installation
Select or click on the logo to access the application page details. Here you will able to see an “Install” button. Click on it to begin to start the installation process.
Step 4: Authenticate
During the installation, You will be prompted to enter your password for administrative privilege. This step is necessary to ensure the security of the installation process. Enter your password and click “Authenticate.” After authentication the software center will download and install it, and the progress will reflect the installation status.
Now we are discussing another command line method, where we needed a terminal to execute some Linux commands for installation. You can choose any one method, that best fits you after that move to further steps 5.
Terminal Command Line Method
Navigate to the Terminal
Launch the Terminal on your Ubuntu system. You can do this by either pressing Ctrl + Alt + T or searching for “Terminal” in your application launcher. Update your package index list through the following
sudo apt update
Enter your password when prompted.
Installing Skype
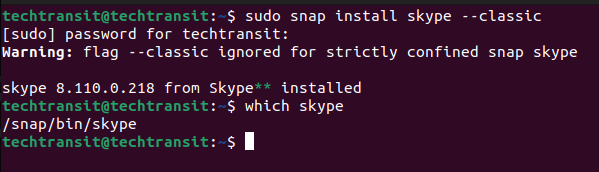
With Snapd in place, you’re ready to install. Execute the following command to download and install the Skype snap package:
sudo snap install skype –classic
Once the installation is complete, move to further step number 5.
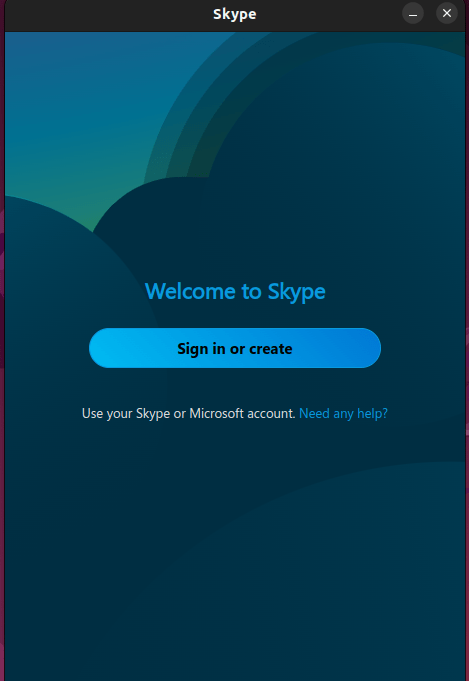
Step 5: Open Skype
Now it is successfully installed, you can open it directly from the application launcher or Ubuntu Software Center. Click on the logo to open the application.
Step 6: Log In to Your Account
After Launching, sign in with your account. If you don’t have one, you can create it during the setup process.
Step 7: Verify Your Setup
To ensure that everything is working perfectly, Make a test call or video call with Skype features. This will allow you to confirm that it is set up correctly on your Ubuntu system.
Congratulations! You’ve now installed Skype on Ubuntu using the graphical interface or command line terminal method , making communication more accessible and enjoyable. If you encounter any issues during installation, double-check the steps and ensure that your system meets the necessary requirements for a smooth Skype experience.

I’m Sachin Gupta — a freelance IT support specialist and founder of Tech Transit. I’m certified in Linux, Ansible, OpenShift (Red Hat), cPanel, and ITIL, with over 15 years of hands-on experience. I create beginner-friendly Linux tutorials, help with Ansible automation, and offer IT support on platforms like Upwork, Freelancer, and PeoplePerHour. Follow Tech Transit for practical tips, hosting guides, and real-world Linux expertise!