

Last Updated on 5 months by Sachin G
Red Hat Enterprise Linux (RHEL) is a powerful and versatile operating system renowned for its stability, security, and performance. However, before embarking on your journey with RHEL, mastering the installation process is paramount.
Whether you’re an IT professional or just starting your Linux journey, installing RHEL can unlock a world of possibilities. This guide will walk you through Red Hat Enterprise Linux ( RHEL ) and the installation process step-by-step, ensuring a smooth and successful experience.
System requirements for RHEL
- The Red Hat Enterprise Linux is mostly available on the following architectures. RHEL supports 64 bit architechtures hardware.
- 64-bit AMD
- 64-bit Intel
- IBM POWER
- IBM System
- To install Red Hat Enterprise Linux, a minimum of 10 GiB of available disk space is required. This space should be present in either unpartitioned disk space or in partitions eligible for deletion.
How to Download Red Hat Enterprise Linux ( RHEL ) DVD ISO
Downloading the RHEL DVD ISO image is the first step towards deploying this powerful OS on your system. In this guide, we’ll walk you through the process of downloading the RHEL DVD ISO image, ensuring a smooth and hassle-free experience.
Start by navigating to the Red Hat website Web page CLICK HERE. This is where you’ll find the authorized source for downloading RHEL DVD ISO images. On the RHEL download page, you’ll find various versions and editions of RHEL, including RHEL Server, RHEL Workstation, and RHEL for Edge Computing. Select the version and edition that best suits your requirements and click on the corresponding download link.
For inspire developers, rejoice! Red Hat offers No-cost RHEL Developer Subscription. This subscription give you access to a wealth of resources, empowering you to experiment, innovate, and build exceptional applications. Before proceeding to download No-cost for developers for business purposes, it is advisable to familiarize yourself with the relevant norms. Access the information at Here.
How to Installation Steps of RHEL 9
So let’s begin installation…
Initiating the Installation Process:
Once you have prepared the installation media DVD or ISO , boot the system from the selected media to initiate the installation process. Proceed on screen prompts to access installation wizard, where you will get idea through steps to configure your system.
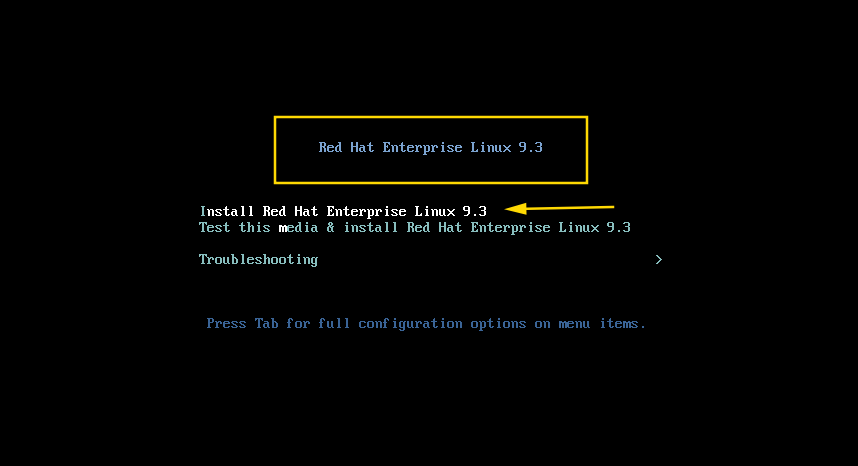
Select Install Red Hat Enterprise Linux 9 on the GRUB menu.
Configuring Installation Settings
During the installation, you’ll be prompted to configure various settings, including language preferences, time zone, keyboard layout, and network configuration
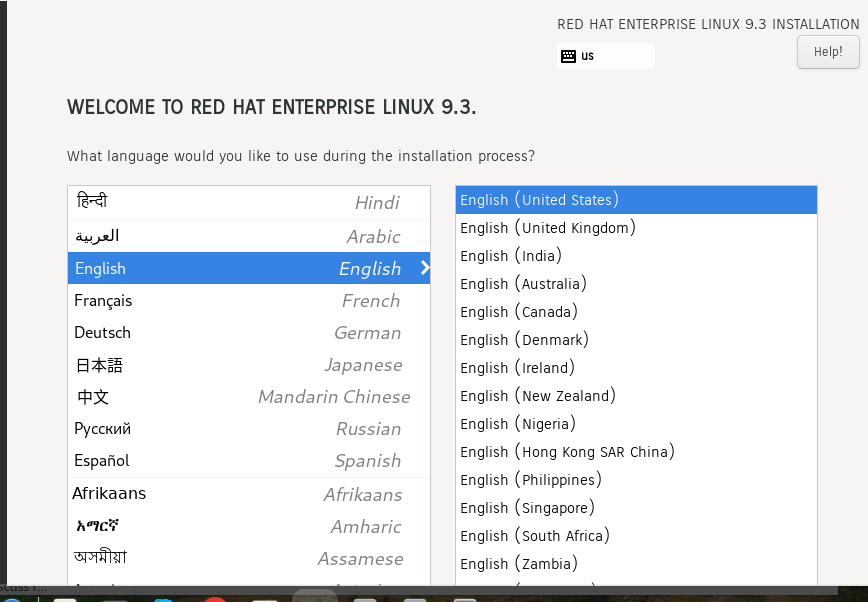
Choose your language preference, Which would you like to use during the installation process.
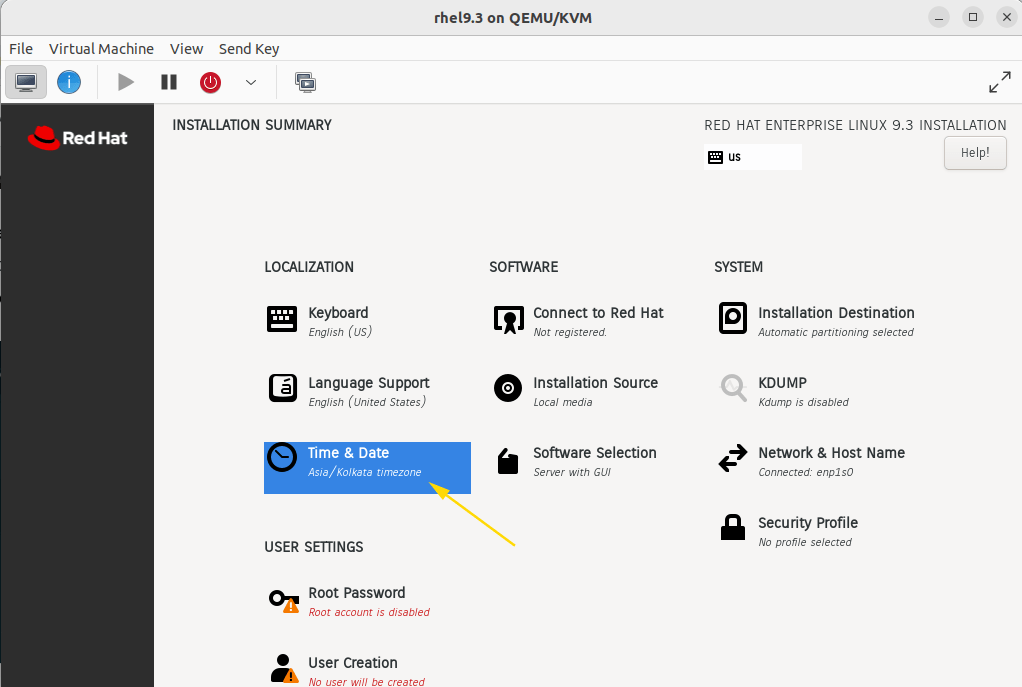
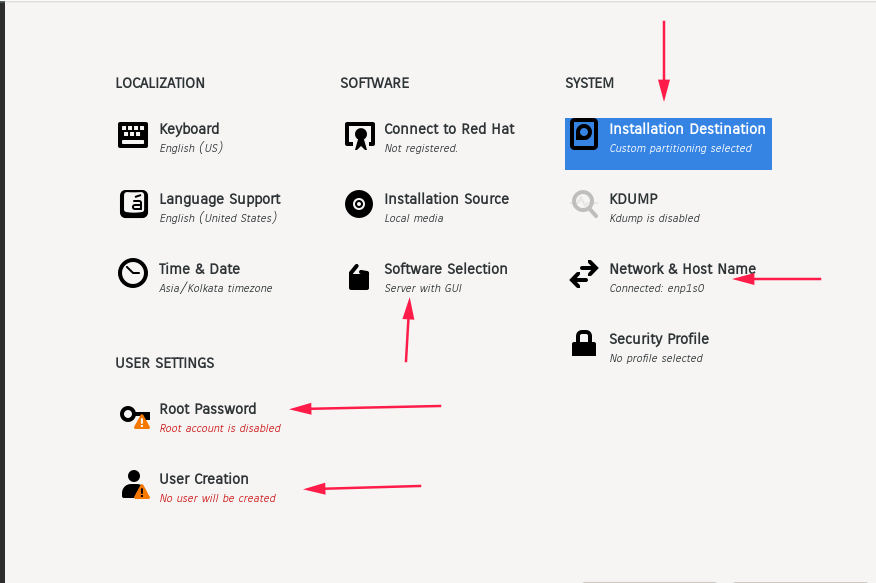
Now in step third gives us options to set location, Date, and Time, In the software section, I have chosen Server with GUI option for graphical interface and at last, in the System section there is an installation destination, and you can choose to customize your partition scheme.
Partitioning and Disk Setup
One of the critical steps in the installation process involves partitioning the disk and defining the storage layout for RHEL. Choose the appropriate partitioning scheme, whether it’s manual partitioning or guided partitioning based on predefined layouts. Allocate disk space for the root partition, home partition, swap space, and any additional partitions required for your system
In choosing the partitioning section , select the device where you want to install and I have chosen the option “I will configure partitioning” after the selection of your choice, click on the left-hand top there is a “Done” menu button. After clicking on the “Done” menu button you will find another screen where you can create partitions as per your choice.

Select standard partition type
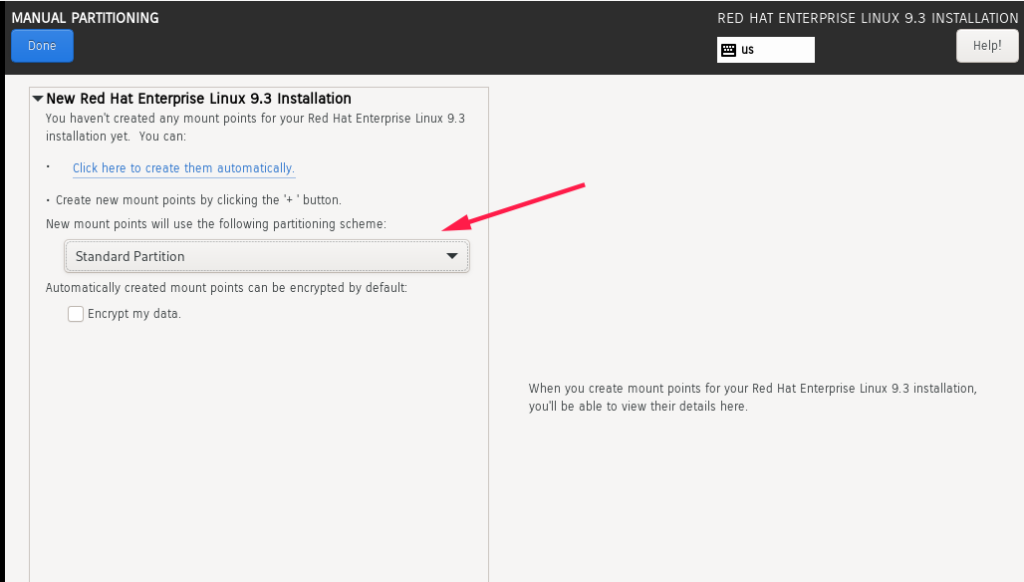
You can use the “+” icon to create a partition. You just need to specify the mount point and the size in MB or GB as desired. The best thing about RHEL is that when you bring your mouse over to the text box, it will show you how and what values need to be supplied.
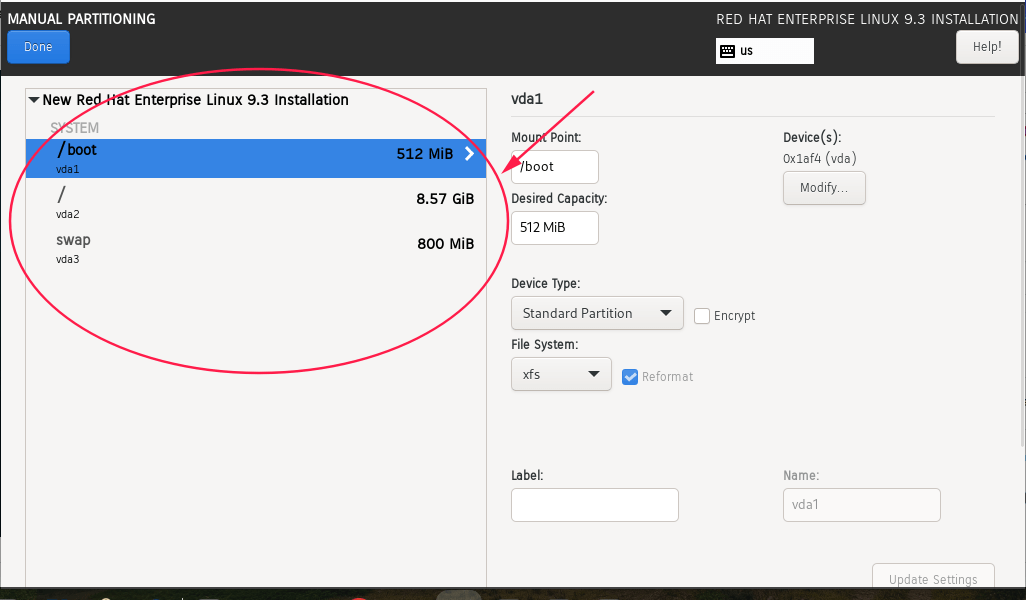
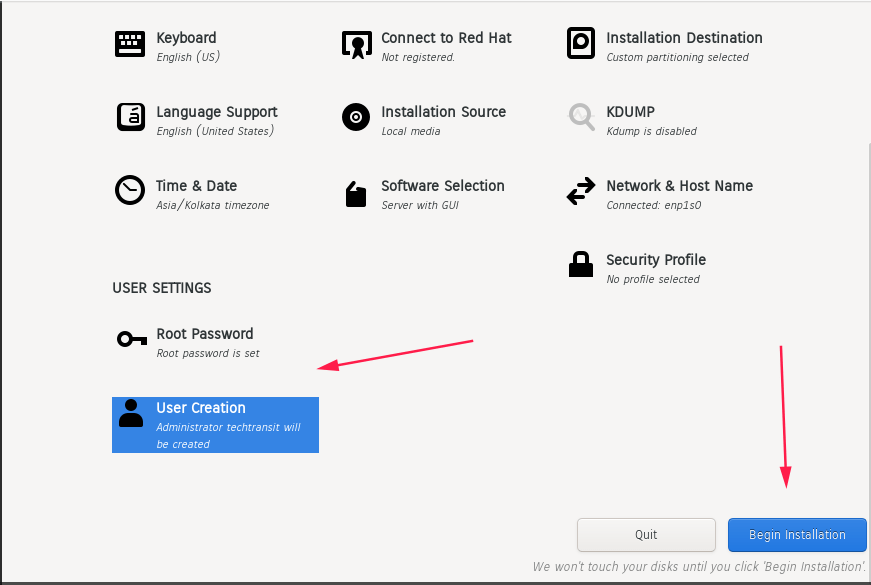
I have only created /, boot, and swapped basic partition.So that you can have idea about procedure, you can select disk partition space according to your need . Installation Destination option looks without a notice sign. After that you have to set root user password as well create a create a user and update settings as you required.
Finalizing the Installation
Once you have configured all installation settings and software selections, proceed to finalize the installation process. Review the summary of configuration settings to ensure accuracy and completeness before initiating the installation. Once confirmed, proceed with the installation, allowing the system to install the selected packages and configure the system components.
Post-Installation Tasks
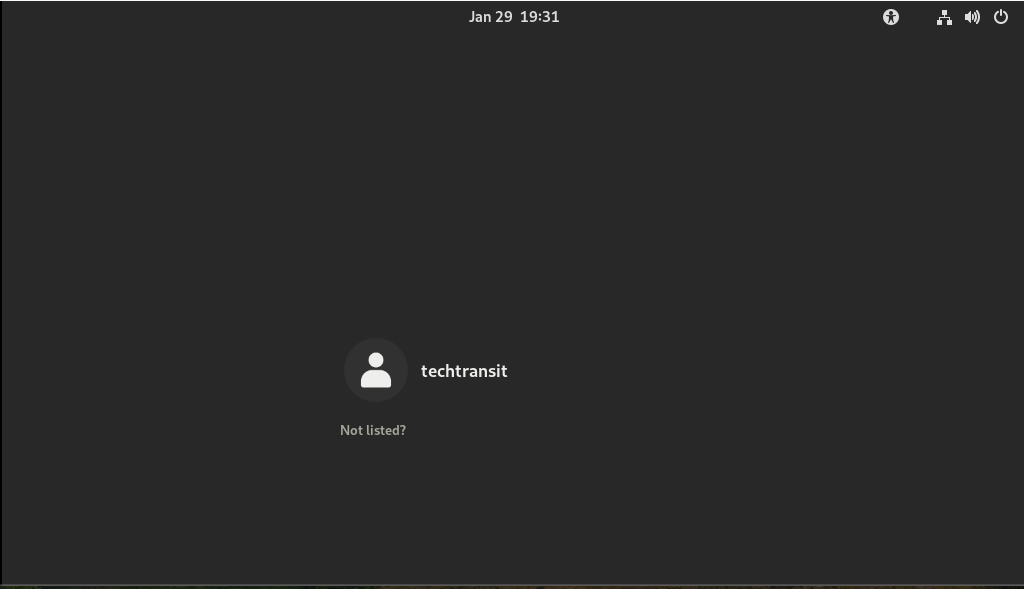
Upon successful installation of Red Hat Enterprise Linux, perform post-installation tasks to ensure system integrity and functionality. Update the system packages to the latest versions, configure user accounts and permissions, and perform system optimizations to enhance performance and security.
Some other topics related to downloading CentOS Stream and Installation of alternative of RHEL like almalinux on below link..
- Steps to Install Free Enterprise AlmaLinux 8 Operating System
- Download CentOS Stream ISO, Container, and RPM Packages

I am a professional freelance contributor and the founder of Tech Transit. I hold certifications in Linux, Ansible, and OpenShift from Red Hat, as well as CPanel and ITIL certifications. With a passion for education, culture, and community, I love writing and sharing knowledge. Since 2009, I’ve been actively using, setting up, supporting, and maintaining Linux systems. Linux truly rocks!