
Last Updated on 11 months ago by Sachin G
Managing multiple websites, email accounts, and databases on a Linux server can quickly become overwhelming. While cPanel is a popular choice, its licensing costs are high. If you’re looking for a free, open-source, and lightweight alternative, then Hestia Control Panel (HestiaCP) is an excellent option.
In this guide, I’ll share a complete, beginner-friendly tutorial on how to install Hestia Control Panel on Ubuntu or Debian Linux. By the end of this article, you’ll have a fully functional hosting panel to manage your domains, emails, DNS, and more—all through a modern web-based interface.
What is Hestia Control Panel and Why Use It?
Hestia Control Panel is an open-source hosting control panel for Linux servers, built as a fork of VestaCP. It provides a web-based interface and powerful CLI tools for managing your server without needing to manually edit configuration files.
Some key features of HestiaCP:
- Web Hosting Management – Manage domains, subdomains, and SSL certificates.
- Mail Server Integration – Built-in Exim, Dovecot, and Antivirus (ClamAV).
- DNS Management – Configure DNS zones using Bind.
- Database Support – MariaDB/MySQL and PostgreSQL support.
- Security – Includes Fail2Ban and iptables firewall.
- User-Friendly Interface – Lightweight, responsive, and modern UI.
In short, HestiaCP is a perfect alternative to cPanel or Plesk for Ubuntu and Debian servers. It’s ideal for VPS, cloud servers, or dedicated hosting environments.
System Requirements for Installing HestiaCP
Before starting the installation, make sure your server meets the following requirements:
Important: HestiaCP must be installed on a fresh OS installation, as the script may overwrite existing configurations and wipe data.
Minimum 10 GB Disk Space needed, and recommended disk space is 40 GB . CPU should at least 1 core 64 bit structure and 4 core cpu processor is recommended.
| Minimum Operating System | Recommended OS | Minimum Memory | Recommended Memory |
| Debian 10, 11,12 Ubuntu 20.04, 22.04 LTS | Latest Debian / Ubuntu LTS | 1 GB | 4 GB |
For more details, visit the official HestiaCP website or check their GitHub repository
Here we are going to do the installation of the latest version. You can get the installation script from its official website hestiacp.com.
Pre-Installation Checklist
Before installing, ensure you:
✔ Have root SSH access to the server.
✔ Use a fresh Ubuntu or Debian installation.
✔ Can execute shell commands.
Step-by-Step Installation of Hestia Control Panel on Ubuntu/Debian
Step 1: Update and upgrade Software Package
Update and upgrade the index package and install latest version of installed package .To do this run the below following commands .
apt-get update; apt-get upgrade -y
For download of installation script it need SSL validation , so we have to first ensure the installation of be package .You can do this with the following command:
apt-get install ca-certificates
Before download the script , confirm you will have wget command on operating system.
apt install -y wget
Step 2: Download the script
To download the script , use official site URL for the correct download link below as they release new versions often.
wget https://raw.githubusercontent.com/hestiacp/hestiacp/release/install/hst-install.sh
Step 3: Run the installation script
Once the installation script has been downloaded, you can run it by running the following command:
bash hst-install.sh
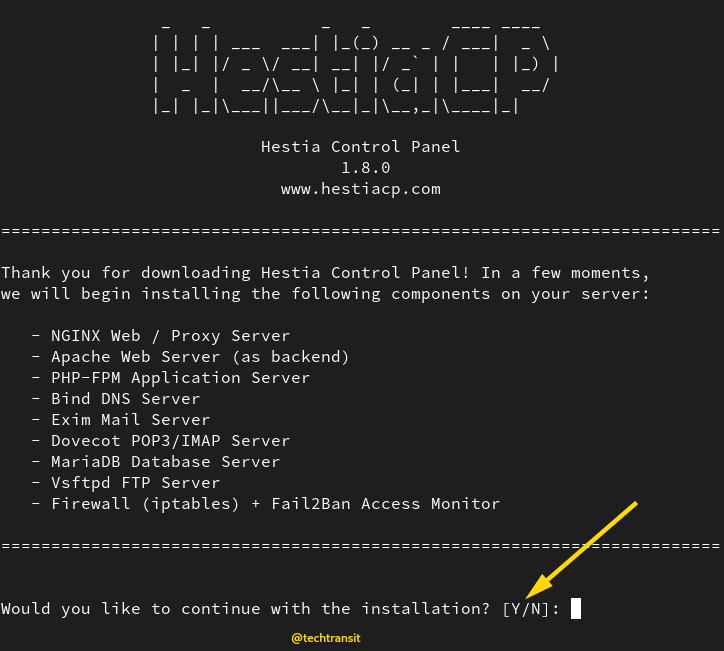
After executing the above command below screen message you will get and then if you want to proceed put your answer is “y” and the installer will the below software component .
After submit your answer in Yes then you will get some more interactive question like , your mail address as well as the host name , which you want to setup .please look below .
Would you like to continue with the installation? [Y/N]: Y
Please use a valid emailadress (ex. info@domain.tld).
Please enter admin email address:
Please enter FQDN hostname [techtransit]: panel.techtransit.org
========================================================================
Thank you for downloading Hestia Control Panel! In a few moments,
we will begin installing the following components on your server:
- NGINX Web / Proxy Server
- Apache Web Server (as backend)
- PHP-FPM Application Server
- Bind DNS Server
- Exim Mail Server
- Dovecot POP3/IMAP Server
- MariaDB Database Server
- Vsftpd FTP Server
- Firewall (iptables) + Fail2Ban Access Monitor
========================================================================
You have the option to customize your software choices based on your requirements. If you wish to install specific services, you can simply navigate to the Hestia panel and execute the corresponding generated command.
Below, I have generated a simple command from the Hestia website for illustrative purposes.
sudo bash hst-install.sh –port ‘8083’ –lang ‘en’ –apache yes –phpfpm yes –multiphp yes –vsftpd yes –proftpd no –named yes –mariadb yes –mysql8 no –postgresql no –exim yes –dovecot yes –sieve no –clamav yes –spamassassin yes –iptables yes –fail2ban yes –quota no –api yes –interactive yes –force no
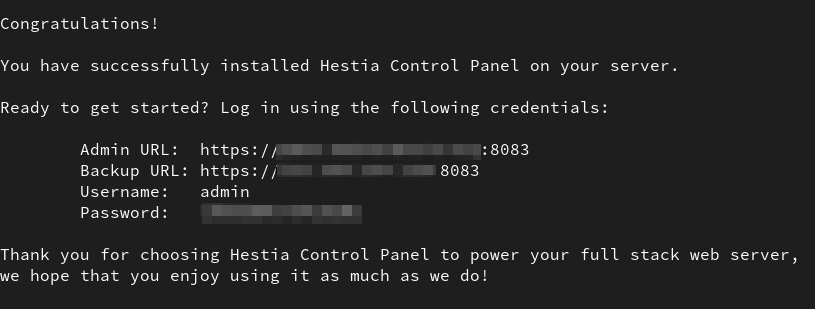
Step 4: Access Control Panel
After installation, the script will show the login URL and admin credentials:
https://server_ip_address:8083/
https://hostname:8083/
Common Installation Errors & Fixes
Error: Hestia install detected. unable to continue
This means HestiaCP is already installed. To reinstall:
bash hst-uninstall.shUninstall Hestia Control Panel
If you need to uninstall:
bash hst-uninstall.shHestiaCP vs Other Panels (cPanel, aaPanel, Virtualmin)
- HestiaCP is free and open-source.
- cPanel is paid and resource-heavy.
- aaPanel is another good alternative, especially for Debian 12.
If you’re considering alternatives, check my guide on How to Install aaPanel
Best Practices After Installation
✔ Enable automatic backups from the Hestia dashboard.
✔ Secure your server with SSL and Fail2Ban.
✔ Regularly update HestiaCP via CLI or GUI.
FAQ – Frequently Asked Questions
No, HestiaCP only supports Ubuntu and Debian-based distributions.
8083 (can be changed during installation).
For personal or small business hosting, yes. For large-scale hosting, cPanel still dominates.
Hestia Control Panel is an excellent choice for those who need a lightweight, free, and reliable hosting control panel for Ubuntu or Debian servers. With features like domain management, email services, DNS configuration, and firewall security, it’s an all-in-one solution for system admins and developers.

I’m Sachin Gupta — a freelance IT support specialist and founder of techtransit.org. I’m certified in Linux, Ansible, OpenShift (Red Hat), cPanel, and ITIL, with over 15 years of hands-on experience. I create beginner-friendly Linux tutorials, help with Ansible automation, and offer IT support on platforms like Upwork, Freelancer, and PeoplePerHour. Follow Tech Transit for practical tips, hosting guides, and real-world Linux expertise!