
Last Updated on 1 year ago by Sachin G
aaPanel is a free and open-source PHP-based hosting panel. It installs in minutes and is very easy to manage through one click. This panel improves the efficiency of managing the server, and it also supports the Nginx web server and LEMP and LAMP Server. In this article, I will show how to install aaPanel on Ubuntu and configure the panel settings. I will also cover how to change the default port and basic secure the control panel. aaPanel is also in trend these days. You can check our article related to 10 best web host panel.
Prerequisites
Ensure that you are using a clean or fresh installed operating system, there should no other environment with Apache/Nginx/php/MySQL installed . Before you begin, you will need the following:
- Operating System : Ubuntu 22.04.2 / Ubuntu 20.04.6 / Ubuntu 18.04.6 LTS
- Minimum Memory : 2GB of RAM
- Minimum Storage : 20 GB Disk Space
- A domain name and a hosting provider.
- A SSH client.
Step 1: Update and upgrade current Ubuntu Operating System
First login in your ubuntu server through SSH , below command is ssh basic syntax.
# ssh username@IP/HostnameThen you can switch to root user to perform all the steps.
$ sudo su -Update the package index will ensure that you have latest list of avaialble updates and Upgrade will install latest version of all installed packages. To do this run the below following commands .
# apt-get update; apt-get upgrade -y;After updated or upgraded your system, you will need to reboot your server for the changes to take effect.
rebootStep 2: Install the aaPanel installation script on Ubuntu
To download the aaPanel installation script – you may also verify the script URL from its official website for the correct download link below as they release new versions often.
To install the aaPanel installation script, run this command:
# cd /tmp ; wget http://www.aapanel.com/script/install-ubuntu_6.0_en.shThis will download the installation script to your /tmp directory.
Step 3: Run the aaPanel installation script
Once the installation script has been downloaded, you can run it by running the following command:
# bash install-ubuntu_6.0_en.sh The script will start the process of installation and finish in few minutes.
Here are some interactive question asked by aapanel script. like below.
Do you want to install aaPanel to the /www directory now?(y/n): y
SSL will be automatically enabled in 10 seconds.Do you need to enable the panel SSl ? (yes/n): n
After completing you will see the below like output in couple of minutes.
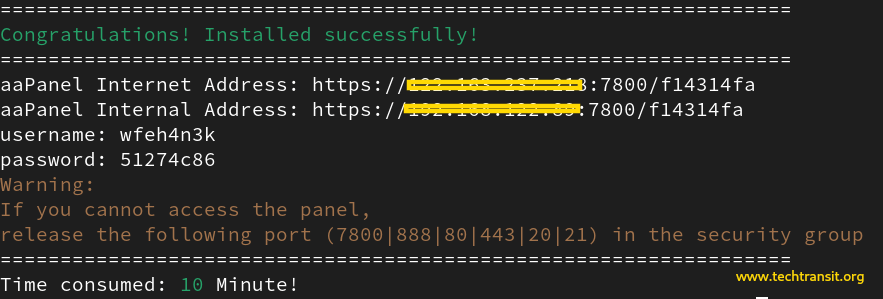
The output will show web hosting panel login url with username and password . You can simple put the url in browser and accept self signed SSL certificate and insert username and password. After successful login you will see the control panel and pop window with Recommended Software package .
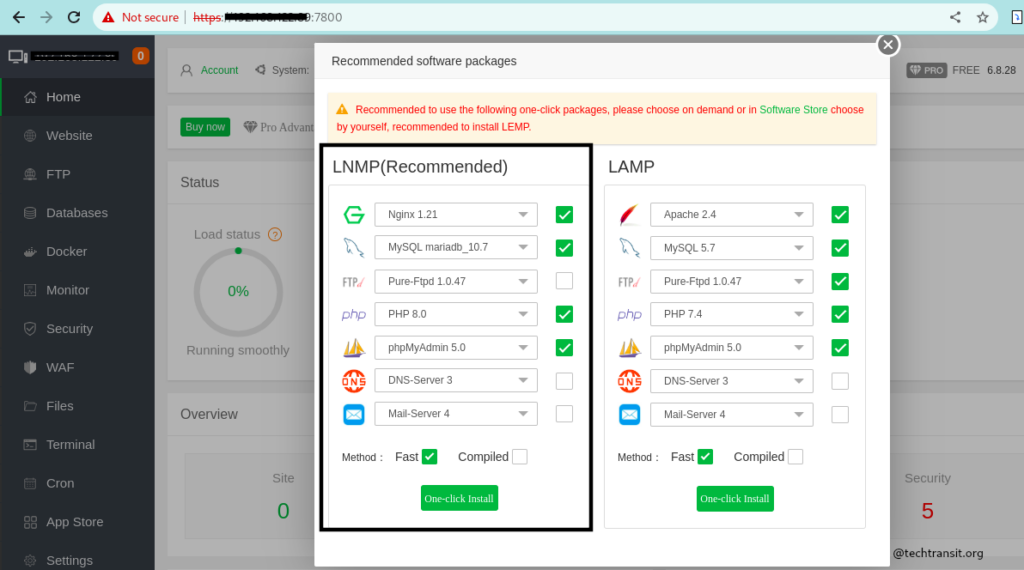
Their are two block LNMP and LAMP , set of software’s , which consist of Nginx or Apache , PHP and MySQL or MariaDB different version available. You can choose the following one-click set of packages . It can take some couple of hours, if it is installing through source.
Step 4: Configure the aaPanel panel settings
Once the aaPanel installation process is complete, you will be able to access the aaPanel control panel at http://your_domain/security_entrance
The first thing you will need to do is configure the panel settings. To do this, click on the “Settings” tab in the aaPanel control panel. In the “Settings” tab, you will need to configure the following settings:
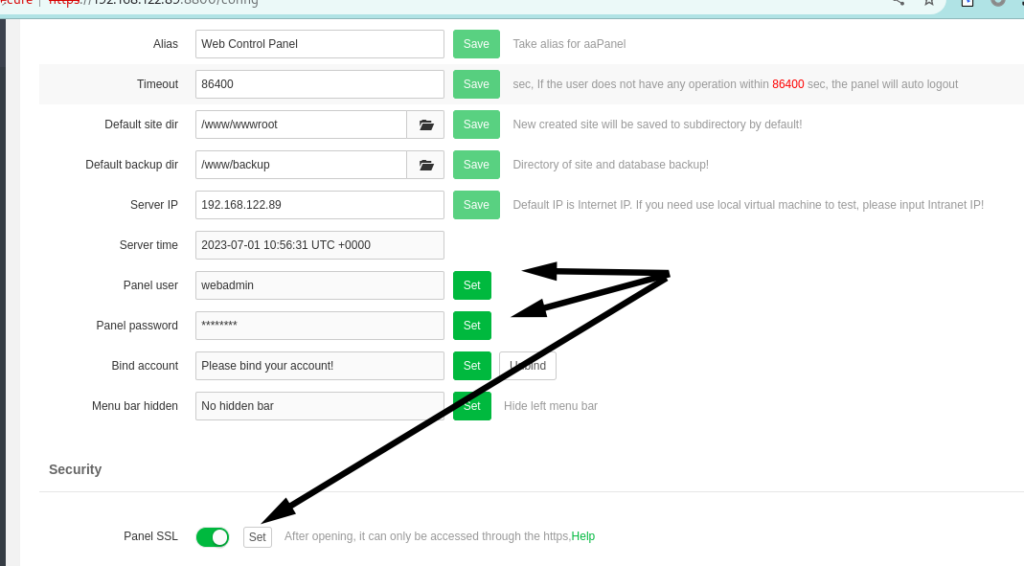
Click on “Settings” tab, you can configure the following settings:
- Panel Name: Set the Web Control Panel Name , it will show on Login Screen as well as on Tab Bar .
- Panel Language: Select Language you want to use to manage panel.
- Default Port: The default port to access the panel is 7800 , you should configure different port to access the panel.
- Admin Username Password: This is the username & password for the aa Panel administrator account.
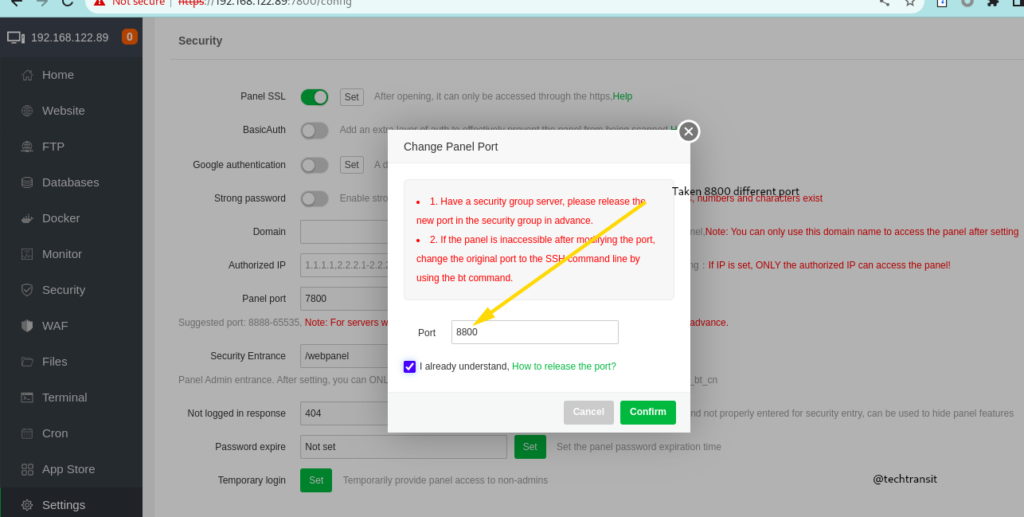
Step 5: Change the default port
By default, the aaPanel control panel listens on port 7800. This is a well-known port that is often blocked by firewalls. To avoid this, you can change the default port to a different port.
To change the default port, you can open the Setting tab and change the PORT value to the desired port number you want to use.When you save , you will be disconnected from browser because access port has been changed. then you should try with new port , which you set.
Step 6: Secure the aaPanel control panel
Once installed and configured , it is important to secure the web control panel. You can do this by following these steps:
- Implement and Enable SSL : This will ensure your panel communication is encrypted .
- Change the administrator username & password : Change Panel admin login credentials with complex password and username.
- Change the Security Entrance path .
- Enable two-factor authentication: This will be extra layer of security to access the control panel.
I hope this article was helpful!

I’m Sachin Gupta — a freelance IT support specialist and founder of techtransit.org. I’m certified in Linux, Ansible, OpenShift (Red Hat), cPanel, and ITIL, with over 15 years of hands-on experience. I create beginner-friendly Linux tutorials, help with Ansible automation, and offer IT support on platforms like Upwork, Freelancer, and PeoplePerHour. Follow Tech Transit for practical tips, hosting guides, and real-world Linux expertise!