
Last Updated on 2 months by Sachin G
This article explains walks you to install Ubuntu 22.04 LTS Server. It begins with downloading the ISO file, creating a bootable USB drive, and proceeds through booting the system, selecting installation options, configuring keyboard layout, network settings, and proxy configurations. The tutorial is designed to assist both beginners and experienced users in setting up Ubuntu Server efficiently.
Ubuntu Server is an extremely popular and versatile operating system that can be utilized for various objectives such as web hosting, file sharing, and development. The installation process of Ubuntu Server on a physical machine can be quite intimidating. This is where virtual machines become valuable.
Step 1: Download the Ubuntu 22 Server ISO file
Go to the Ubuntu from its official website: Download Ubuntu Server 22 LTS and download the Ubuntu 22 ISO file. You can also download the desktop version to download from its official website , it is depend on your uses . To do perfect installation , you should have correct & checksum verify ISO file . I have also Verify ISO through these steps .

Step-2: Create a bootable USB drive
For installing Ubuntu 22 LTS on Virtual Box or KVM ( Kernel-based Virtual Machine ) , it is recommended to use the ISO image rather than a bootable USB Stick or DVD . Here we are using the virtual environment then we can select ISO method and if needed a bootable usb then you can use dd command to create USB stick bootable pendrive . If we were using a bare metal installation then we can use bootable DVD or USB drive. If you want to create bootable USB or DVD then you can follow this reference link to create bootable device. Preparing the USB Image or DVD Image.
Step-3: Boot your virtual machine from the ISO File
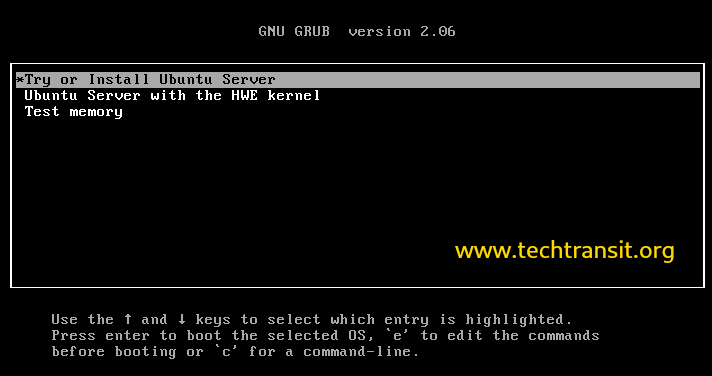
When you boot your vm from the ISO file , you will be presented with the Ubuntu Server installer and it will show couple of options like below in list format. You should select Try or Install Ubuntu Server .
- Try or Install Ubuntu Server
- Ubuntu Server with HWE Kernel
- Test memory
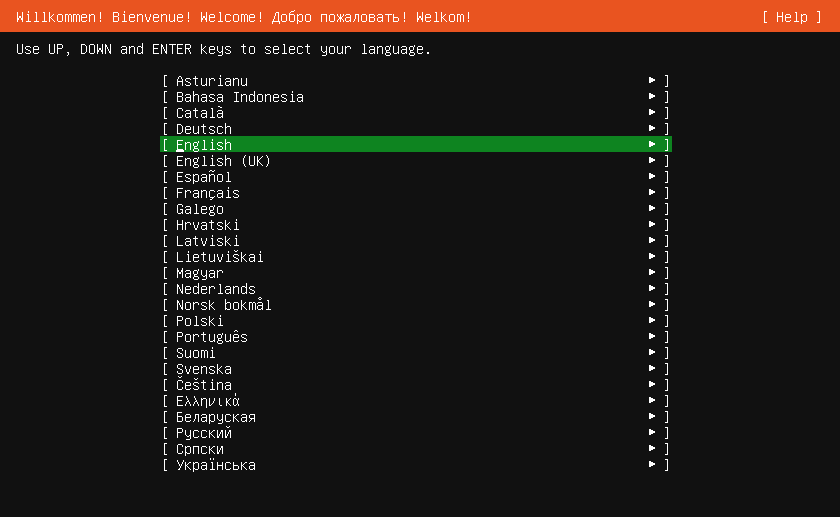
After selection of installation the language needs to be set here, by default English is selected, but according to your preference you can choose from list through Up , Down and Enter keys.
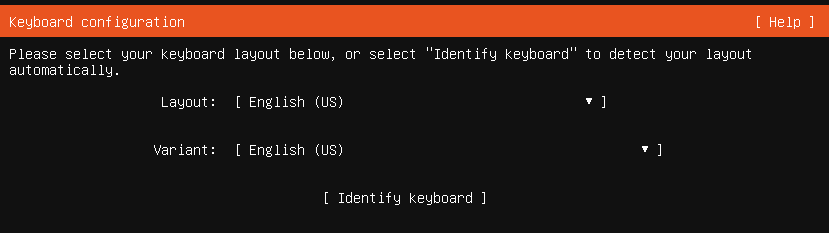
Step-4 – Keyboard Layout Configuration
By default the English ( US ) keyboard layout is selected, you can selected according to your preference.
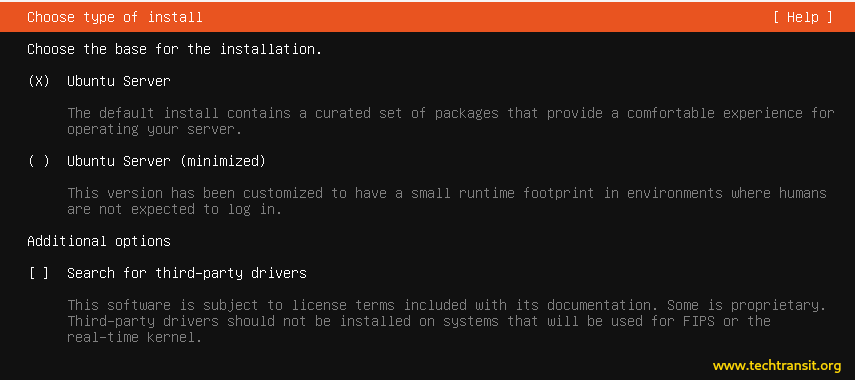
Step-5 – Select the installation type
In Ubuntu server installation there is two type of installation type is available one is server and second one is minimized server. You have to choose according to your need. below is some description for minimized and basic defaults type.
- Ubuntu Server – This is the by default selected choice for the installation. It is having some set of packages , which will provide a good experience to manage your server.
- Ubuntu Server (minimized) – This minimized version is having basic software’s , which helps to run the operating system in small environment.
Here i will go with default selected Ubuntu Server type .
Step-6 – Configure Network Connection
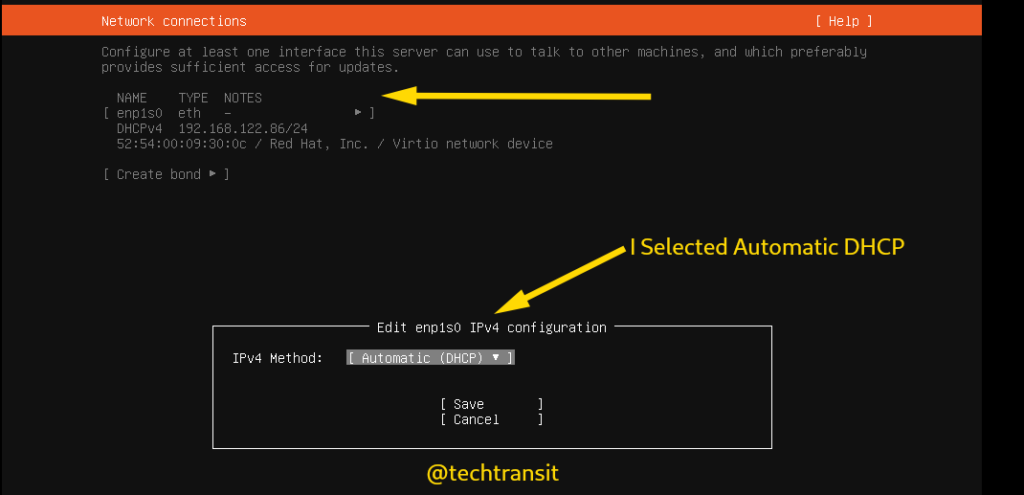
In next steps , Networking will be configured , by default it is selected interface through DHCP , if in your machine is connected through dhcp system then it will get automatically IP address and connected outside the word but if you have to configure manual ISP details then you have to do manual edit IPV4 from selected interface . You can refer below screen shots to configure manual IPV4 address.
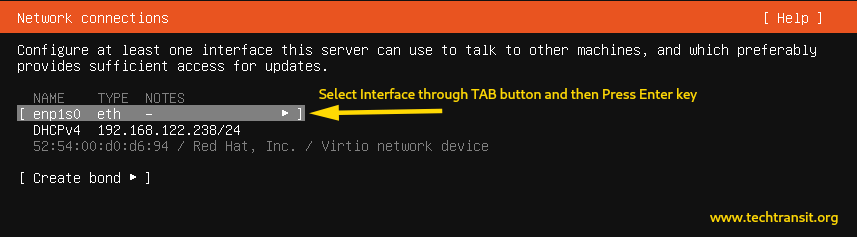
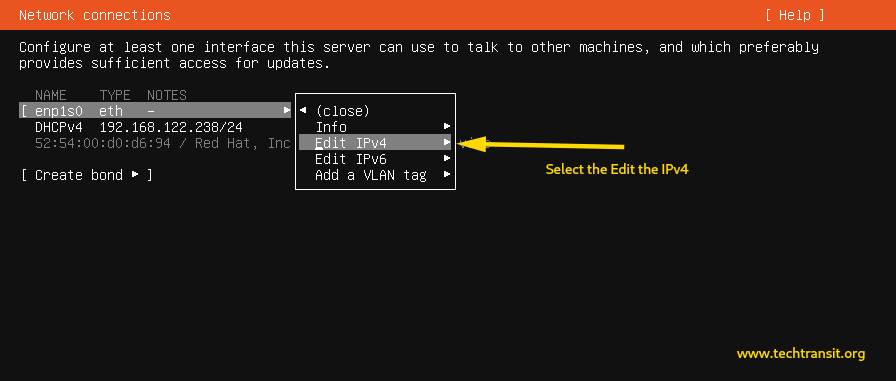
For manual set an IP address, choose the interface (E.g. enp1s0 ) type eth by using the TAB key and hit ENTER to choose “Edit IPv4” .
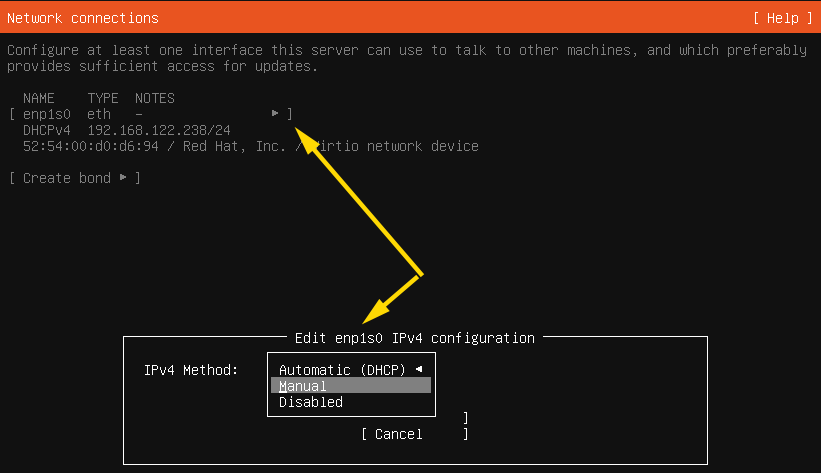
Now select and Enter on Manual update .
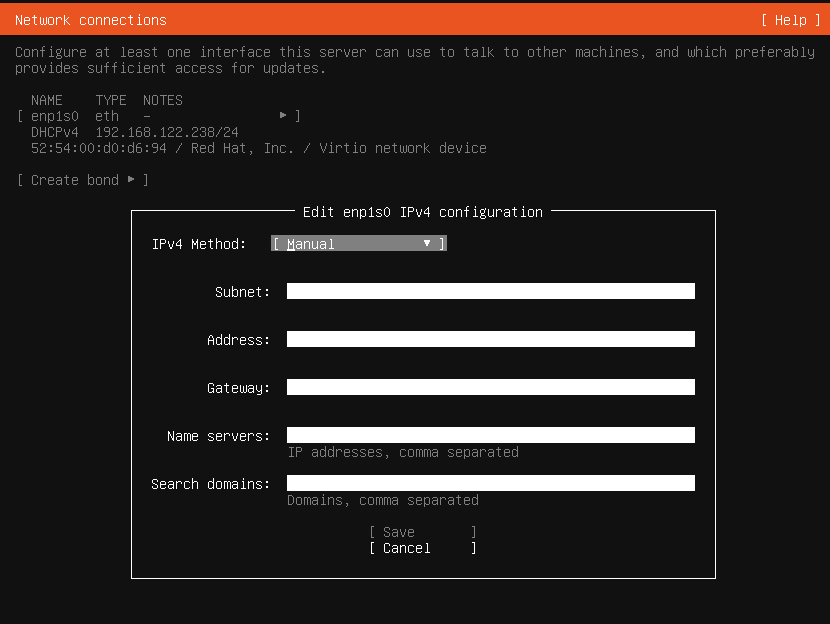
Enter the ISP network configuration like Sub net, IPv4 address, Gateway and Name servers in the respective fields then it will back to main network configuration window their shift through tab and then press Done button for further configuration.
I set Automatic DHCP , so it take automatic the IP Address to communicated to outside the world.
Step-7 – Configure proxy
Next steps is to connect through a proxy , if this machine communicate internet through proxy then you can submit the details in this interface or skip it to blank and press to Done tab .
Step-8 – Archive Mirror
if you use an alternative mirror for ubuntu then submit the details on this tab also else you can skip to next steps.
Step-9 – Disk Partitioning
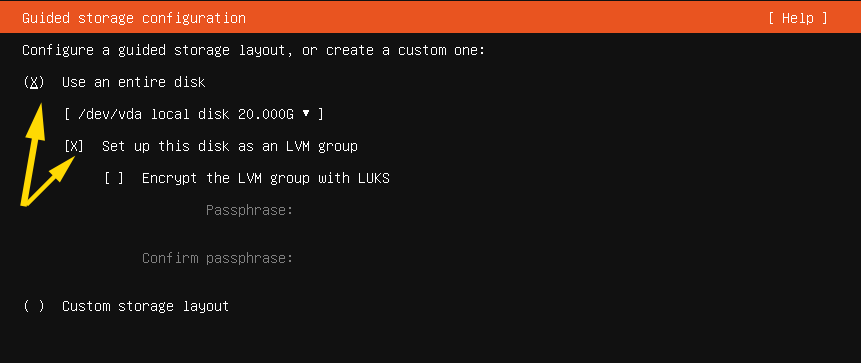
To install the operating system on a disk, you need to configure disk partitioning on the selected disk. There are three methods available.
- Use the Entire Disk : In select this option entire disk will be use and automatic partitioning will be done
- Set up the disk as an LVM Group : In this selection , the partition can be resized in future .
- Custom Storage Layout : Through this option , the manual partition you can create and configure the partition according to you and also enable LVM in the partitioning.
Means better is use with entire disk with select LVM Group selection , so that you can resize in future if disk is remaining on selected volume group OR select customize partitioning scheme.
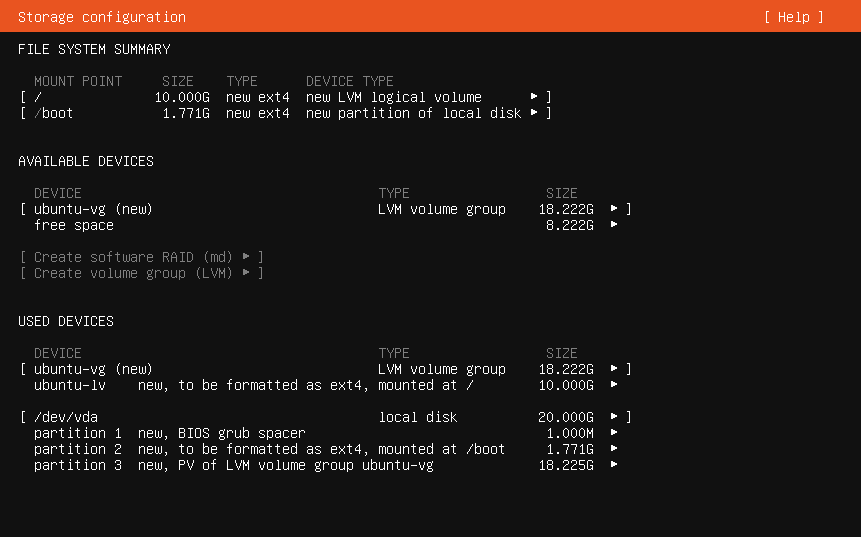
For customize partitioning you will create at least basic partition on installation.You can create some basic partition through follow partitioning wizard, you can move to menu through tab button and also will use enter button to create partitioning .You can use the following partitions and 20 GB of virtual disk space.
- /boot – 1 GB with ext4 file system
- / – 10 GB with xfs file system
- /home – 4 GB with xfs file system
- Swap – 1 GB with swap filesystem
Here i have selected Entire Disk with LVM Partitioning Group.
After choosing and proceeding with the “Done” tab, all partitioning setups will be shown. You can review them and continue by clicking the “Done” button as shown in the screenshot below. Afterwards, it will request your confirmation to proceed with it.
Step 9 – Profile Setup
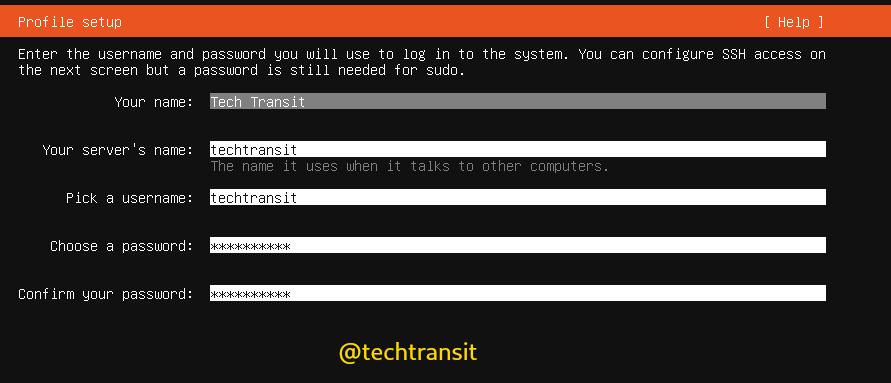
In profile setup , you will setup username and password for further login in server with this username , this user will be a sudo privilege user , after login with this user you can switch or run the commands with sudo prvilege.
Afterward, in the following windows, it asks me to upgrade to Ubuntu Pro. For now, I skip and proceed with the “continue” option.
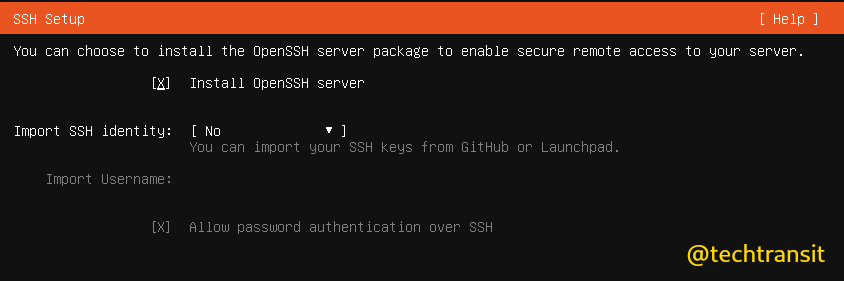
Step 10 – SSH Setup for Remote
In the following window, you will be prompted to activate the OpenSSH server for remote access. Please activate it in order to access my device via the SSH protocol and continue by clicking the “Done” button. Please refer to the screenshot below. Once completed, it will prompt for the feature snap, which I will skip and proceed with the installation.
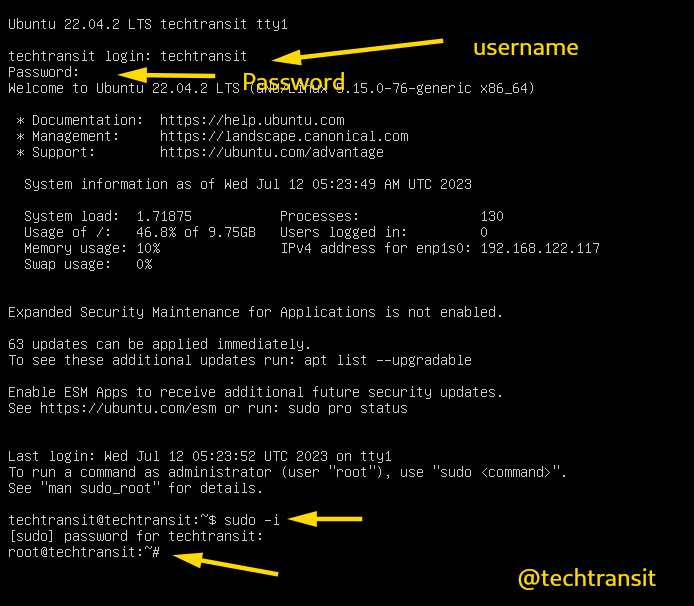
After the installation is complete, it will ask to you for reboot . reboot it and you will be able to access your Ubuntu Server on the virtual machine window . You can login with username and password which you use in installation in profile setup , after that you can use according to your liking .
I hope that you enjoy your installation of Ubuntu latest version . Thank you .

I’m Sachin Gupta — a freelance IT support specialist and founder of Tech Transit. I’m certified in Linux, Ansible, OpenShift (Red Hat), cPanel, and ITIL, with over 15 years of hands-on experience. I create beginner-friendly Linux tutorials, help with Ansible automation, and offer IT support on platforms like Upwork, Freelancer, and PeoplePerHour. Follow Tech Transit for practical tips, hosting guides, and real-world Linux expertise!