
Last Updated on 10 months ago by Sachin G
Managing multiple websites, databases, and email servers on a Linux VPS or dedicated server can be a real headache if you’re doing everything from the command line. This is where Virtualmin, a powerful module for Webmin, makes life easier. It turns your Linux server into a full hosting control panel, so you can manage domains, users, and services without losing speed or security.In this guide, I’ll show you how to install Virtualmin on Webmin for CentOS, AlmaLinux, and Rocky Linux. I’ve used Virtualmin many times as a free alternative to cPanel, and it’s always been a reliable and cost-effective solution for hosting environments.
Whether you’re running an AlmaLinux VPS, working on CentOS, or experimenting with Rocky Linux, this step-by-step tutorial will make the installation process simple. By the end, you’ll have a fully working Virtualmin setup inside your Webmin panel.
What is Virtualmin and Why Use It?
Virtualmin is an open-source hosting control panel built on top of Webmin, designed for Linux servers. It helps manage multiple virtual hosts under a single interface, much like cPanel, but without the licensing costs.
Key Features of Virtualmin:
- Manage multiple domains and subdomains easily.
- Create and manage databases, DNS, mail servers, and SSL certificates.
- Built-in support for NGINX and Apache web servers.
- Granular user permissions for developers and clients.
- Runs on RPM-based distributions like CentOS, AlmaLinux, and Rocky Linux.
If you’re hosting websites on a VPS or dedicated server, Virtualmin provides a complete web hosting environment, reducing dependency on expensive panels like cPanel or Plesk.
Why Install Virtualmin on Webmin?
Webmin is a popular server administration tool, and Virtualmin integrates seamlessly as a module. The combination allows you to:
- Control Linux servers without deep command-line knowledge.
- Automate routine tasks (e.g., domain setup, SSL installation).
- Enable background job management, email configuration, and DNS services.
Many developers, including myself, have used Virtualmin to set up multi-site environments quickly, especially for small businesses and freelance hosting projects.
System Requirements for Virtualmin
- Before we start, make sure your server meets these requirements:
- OS: CentOS 7/8, AlmaLinux 8/9, Rocky Linux 8/9
- RAM: Minimum 1 GB (2 GB recommended)
- Disk Space: 10 GB or more
- Root Access: Required for installation
Step 1: Update Hostname and Update your Linux Server
In Starting update the hostname
# hostnamectlTo set Hostname :
# hostnamectl set-hostname virtualmin.example.comNow hostname should be updated in the/etc/hostname file. After that, your Linux-based distribution should be updated
After setting the hostname, keeping your server updated ensures compatibility with Virtualmin dependencies.
Run the following command:
sudo dnf update -y # For AlmaLinux/Rocky Linux/CentOS 8+Step 2: Download and Installation of Virtualmin :
You can download the Virtualmin script from the official Webmin website. The same script works for all Linux distributions, including both RHEL-based and Debian-based systems.
https://software.virtualmin.com/gpl/scripts/virtualmin-install.shOn the official website, you’ll find several download and installation options. In this guide, we’ll use the installation script method to set up Webmin.
Download the installation script
# wget https://software.virtualmin.com/gpl/scripts/virtualmin-install.shRun the Installer :
Now execute the installer.
# sh virtualmin-install.sh
After executing the shell script, it will ask for the license agreement. Press “Y” to accept the license agreement and Enter to continue.
  Welcome to the GPL installer, version ...

  This script must be run on a freshly installed supported OS. It does not
  perform updates or upgrades (use your system package manager) or license
  changes (use the "virtualmin change-license" command).

  The systems currently supported by install.sh are:

    CentOS/RHEL Linux 6, 7, and 8 on x86_64
    Debian 8, 9, and 10 on i386 and amd64
    Ubuntu 16.04 LTS and 18.04 LTS on i386 and amd64

  If your OS/version/arch is not listed, installation will fail. More
  details about the systems supported by the script can be found here:

    https://www.virtualmin.com/os-support

  The selected package bundle is LAMP and the size of install is
  full. It will require up to 650 MB of disk space.

  Exit and re-run this script with --help flag to see available options.

 Continue? (y/n)
Note: This process takes a few minutes. It installs Virtualmin and all necessary dependencies.
Once the installation is complete, you’re ready to use the Virtualmin console. You can access Virtualmin using a URL like this. In my case, I’m hiding the public IP for security and showing it with an internal IP instead.
Step 3: Access Virtualmin Interface
Once installation is complete:
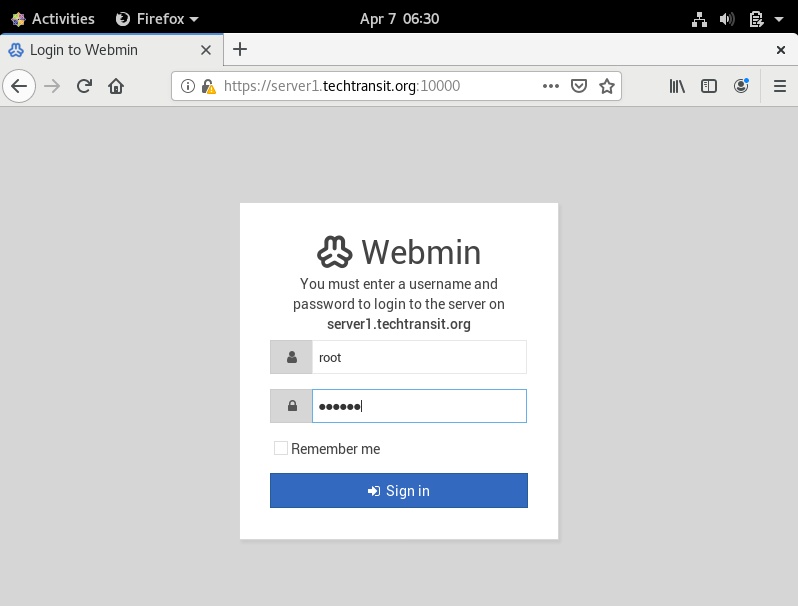
- Open your browser and go to
https://your-server-ip:10000 - Log in using root credentials
- Switch to the Virtualmin tab from Webmin’s dashboard
You’ll see a Post-Installation Wizard where you can:
- Configure MySQL or MariaDB
- Enable DNS and mail services
- Set default Virtual server limits
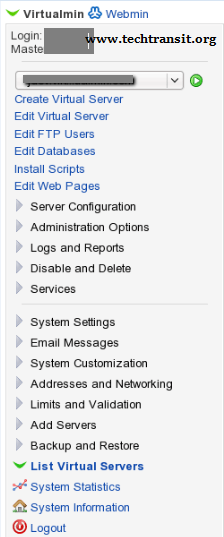
Configuring Virtualmin on Webmin for Linux Servers
Virtualmin provides flexibility to configure hosting environments. Some common tasks include:
- Create a New Virtual Server:
Navigate to Create Virtual Server → Enter domain name → Configure DNS/mail options → Create Server. - Enable SSL:
Under Server Configuration → SSL Certificate, you can request Let’s Encrypt SSL for free. - Manage Databases:
Virtualmin integrates with MySQL/MariaDB, allowing easy database creation and user management.
Best Practices for Virtualmin Installation
- Use a Fresh OS Install: Avoid conflicts with existing configurations.
- Set a Strong Root Password: Security should always be a priority.
- Enable Automatic Updates: Keeps your Virtualmin environment secure.
- Consider a Swap File: For low-memory VPS servers, configure swap to avoid installation issues.
Virtualmin vs. cPanel: Why Choose Virtualmin?
- Cost: Virtualmin is free, while cPanel requires a paid license.
- Flexibility: Supports multiple Linux distributions.
- Open Source: Transparent development and community support.
- Performance: Lightweight compared to other control panels.
For developers or small hosting providers, Virtualmin is an excellent free cPanel alternative without compromising functionality.
Troubleshooting Common Issues
1. Cannot Access Webmin Panel
- Check firewall settings:
sudo firewall-cmd --permanent --add-port=10000/tcp
sudo firewall-cmd --reload
2. Virtualmin Installation Failed
- Ensure your system is fully updated and has enough disk space.
- Use a fresh OS install for best results.
3. SSL Certificate Errors
- Make sure your domain points to the server IP before requesting Let’s Encrypt SSL.
Frequently Asked Questions (FAQ)
Yes, for most use cases. It’s a robust cPanel alternative for managing hosting environments.
Absolutely! Virtualmin fully supports AlmaLinux and Rocky Linux as CentOS alternatives.
Yes, the Virtualmin GPL version is completely free and open-source
By following this guide, you’ve successfully installed Virtualmin on Webmin for CentOS, AlmaLinux, and Rocky Linux. Virtualmin is a reliable, open-source hosting control panel that helps manage multiple sites effortlessly—without breaking the bank.
Learn Smarter. Level Up Faster →
Want to master Linux, DevOps, Ansible, or Cloud workflows the smart way? I’ve curated a list of top-rated, real-world Udemy courses — based on student reviews and practical feedback.
Visit the Recommended Courses page to explore and enroll in courses trusted by the community.
See Curated Courses →
I’m Sachin Gupta — a freelance IT support specialist and founder of techtransit.org. I’m certified in Linux, Ansible, OpenShift (Red Hat), cPanel, and ITIL, with over 15 years of hands-on experience. I create beginner-friendly Linux tutorials, help with Ansible automation, and offer IT support on platforms like Upwork, Freelancer, and PeoplePerHour. Follow Tech Transit for practical tips, hosting guides, and real-world Linux expertise!